
Integrating Splio Forms
Using the Splio Webkit, you can easily embed your Splio forms directly into any website with just a few lines of code.
Step 1 – Create a New Form
- First, you need to create a new form from your Splio interface.
- Go to the Forms section and click on Create New.
- Choose the type of form you want: subscription, unsubscription, or update.
Important: To be visible on your website, the form must be activated from the Share tab.You need to open your form, go to the Share tab, and toggle it to Active.
Example – "Share" tab of a form
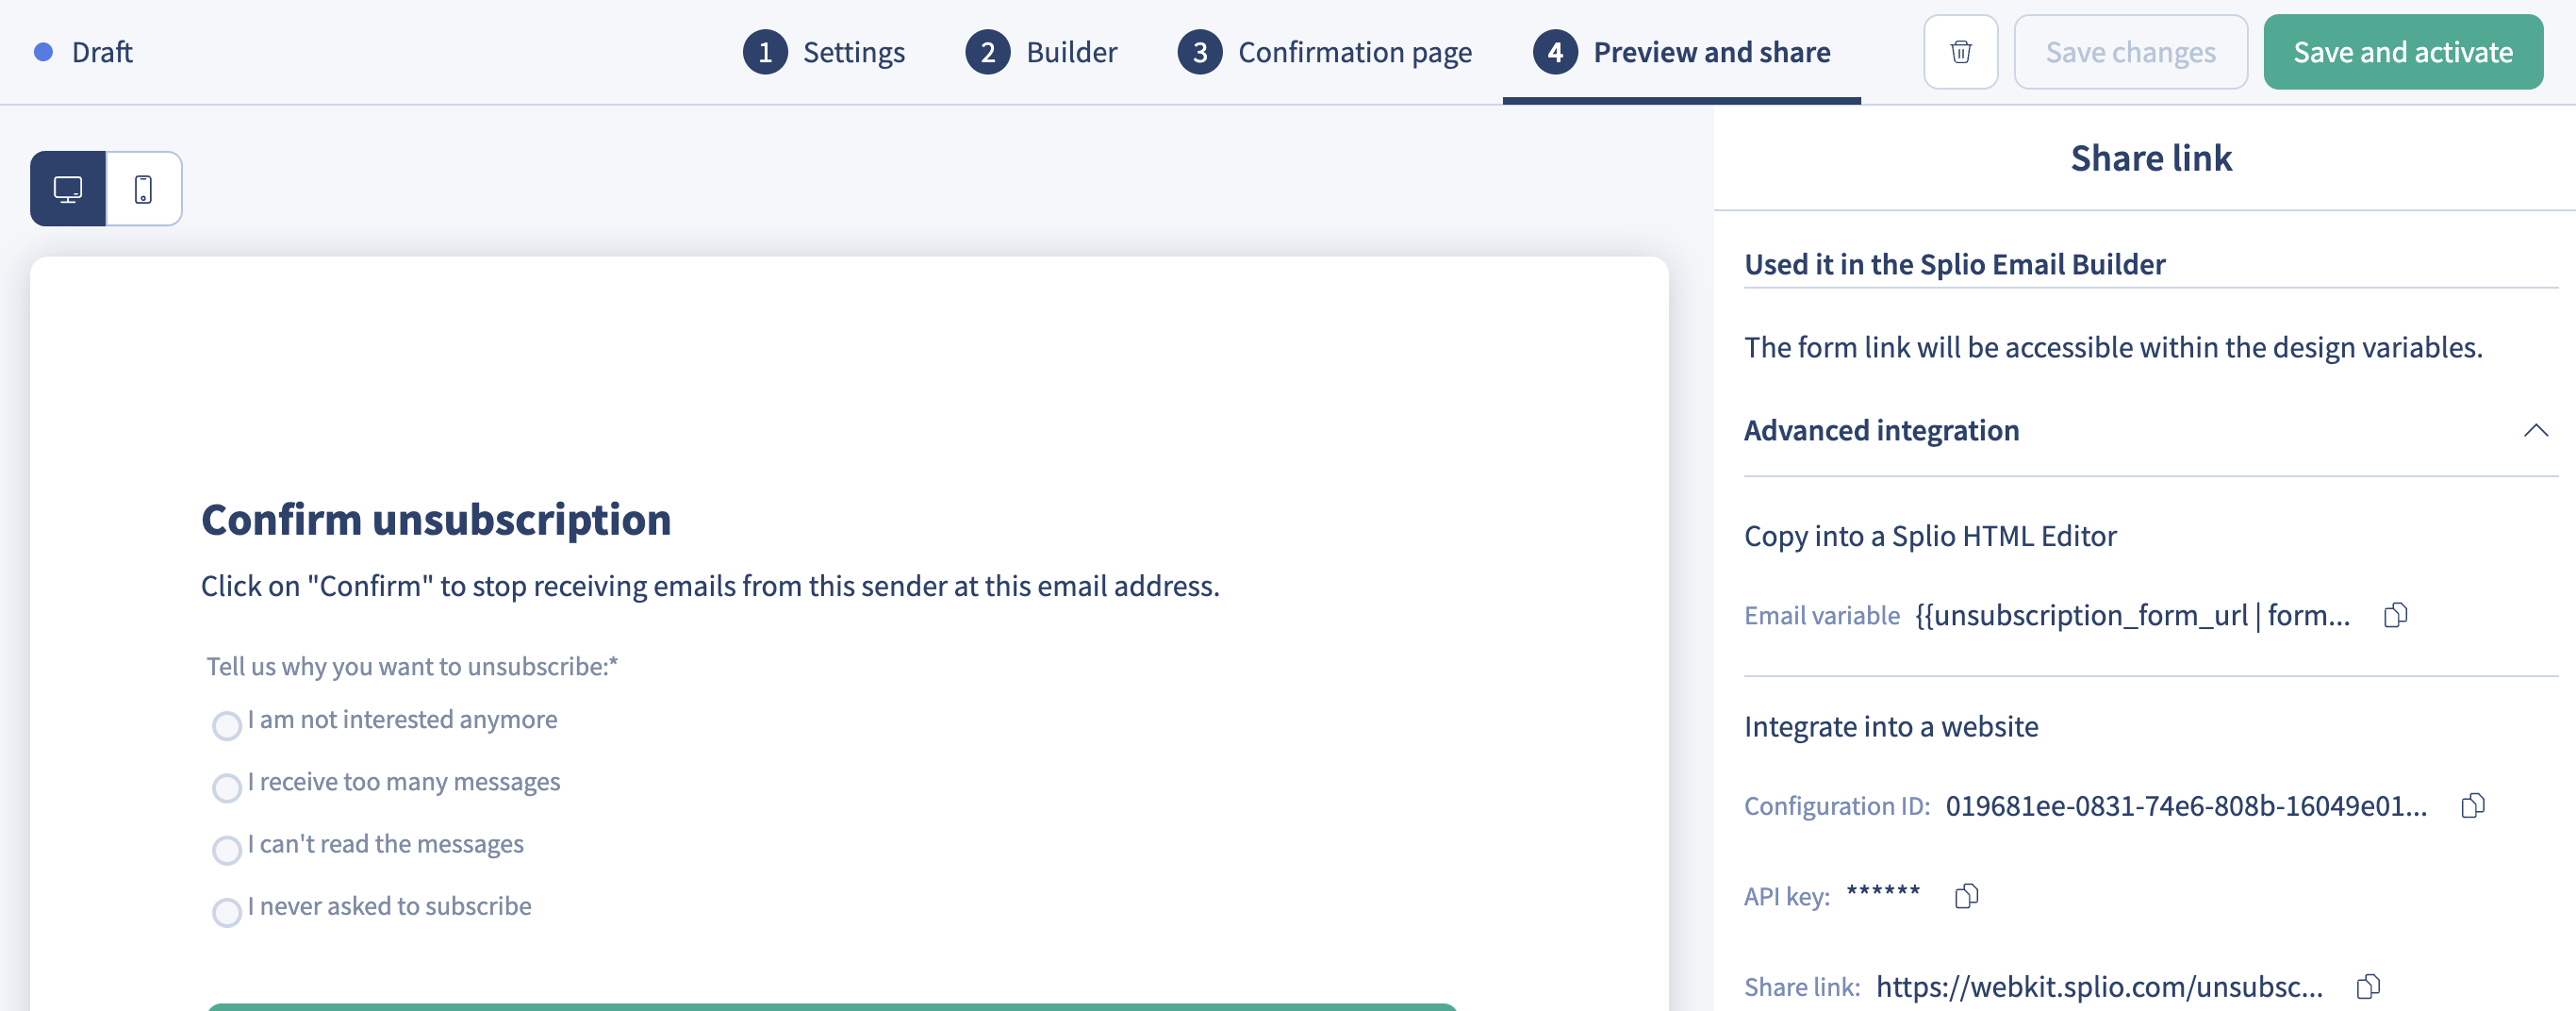
🔐 Retrieve the API Key and Configuration ID
To obtain the API Key and Configuration ID, follow these steps:
- Go to the “Preview and share” tab of your form.
- Click on “Advanced integration” to expand the information section.
- You will find:
- The Configuration ID
- The API Key (partially hidden for security reasons)
These elements are required to generate a JWT token on the server side.
Step 2 – Generate a JWT Token (Server-Side)
To authenticate the SDK, you need to generate a JWT token using your private secret (API key).
Example with Node.js:
import jwt from 'jsonwebtoken';

// Your secret key (found in the "Sharing" tab of your configuration)
const SECRET_KEY = 'YOUR_API_KEY';

// Token payload
const payload = {
  universe: 'YOUR_UNIVERSE',
  external_id: '[email protected]', // Required for unsubscribe_form and update_form
  configuration_id: 'YOUR_CONFIGURATION_ID'
};

const options = {
  algorithm: 'HS256',
};

// Generate token
const token = jwt.sign(payload, SECRET_KEY, options);

console.log('auth-token:', token);
Step 3: Embed the SDK on Your Website (Client-Side)
Once you have the token, integrate the following HTML snippet into your frontend:
<!DOCTYPE html>
<html lang="en">
  <head>
    <meta charset="UTF-8" />
    <meta name="viewport" content="width=device-width, initial-scale=1.0" />
    <!-- Splio Webkit CSS -->
    <link rel="stylesheet" href="https://static.splio.pro/splio-org/engage/webkit/webkit-frontend/v1/splio-web.css" />
  </head>
  <body>

    <!-- SDK Container -->
    <div id="splio-sdk"></div>

    <!-- Splio SDK Script -->
    <script type="module" crossorigin src="https://static.splio.pro/splio-org/engage/webkit/webkit-frontend/v1/splio-web.js"></script>

    <!-- SDK Initialization -->
    <script>
      window.addEventListener('splioSDK:loaded', function () {
        splioSDK.init({
          authType: 'jwt',
          authToken: '{{YOUR_TOKEN}}', // Replace with your actual JWT token
          type: '{{TYPE}}',            // One of: "subscription_form", "unsubscription_form", "update_form"
          display: {
            mode: 'inline',
            container: '#splio-sdk'
          }
        });
      });
    </script>

    <!-- Optional: Custom font styling -->
    <link href="https://fonts.googleapis.com/css2?family=Moirai+One&display=swap" rel="stylesheet" />
    <style>
      body {
        margin: 0;
      }
      .splio-display {
        font-family: 'Moirai One', cursive !important;
      }
    </style>

  </body>
</html>
Available type values
You must set the type property in the splioSDK.init() method according to the kind of form you want to load.
type value | Description |
|---|---|
subscription_form | Embed a form to subscribe a contact |
unsubscription_form | Embed a form to unsubscribe a contact |
update_form | Embed a form to update a contact's data |
Notes
external_idis required only forunsubscription_formandupdate_formtypes.- The
authTokenmust be a valid JWT signed with your configuration API key. - Always use the correct
configuration_idassociated with the form type in your Splio platform. - To ensure optimal security, authentication tokens should be either pre-generated on the server or dynamically signed by the backend, thereby preventing any exposure on the client side.
Updated 10 months ago
Did this page help you?