Salesforce Marketing Cloud - Audiences
Provided by: Splio
Connector type: Destination
Third-party system: Activation platform
Required license: "Marketing Automation + CDP" or "Predictive AI (previously Tinyclues)"

Overview
You can easily retrieve your Splio audiences directly within Salesforce Marketing Cloud as a Data Extension.
- During the setup, you need to configure the platform with appropriate settings so data can flow between both solutions.
- Each time a campaign is executed from Splio, the associated Audience is automatically pushed as a Data Extension from Splio into Salesforce Marketing Cloud
- You can then directly go into Salesforce Marketing Cloud, create a campaign, and select the appropriate audience from Splio.
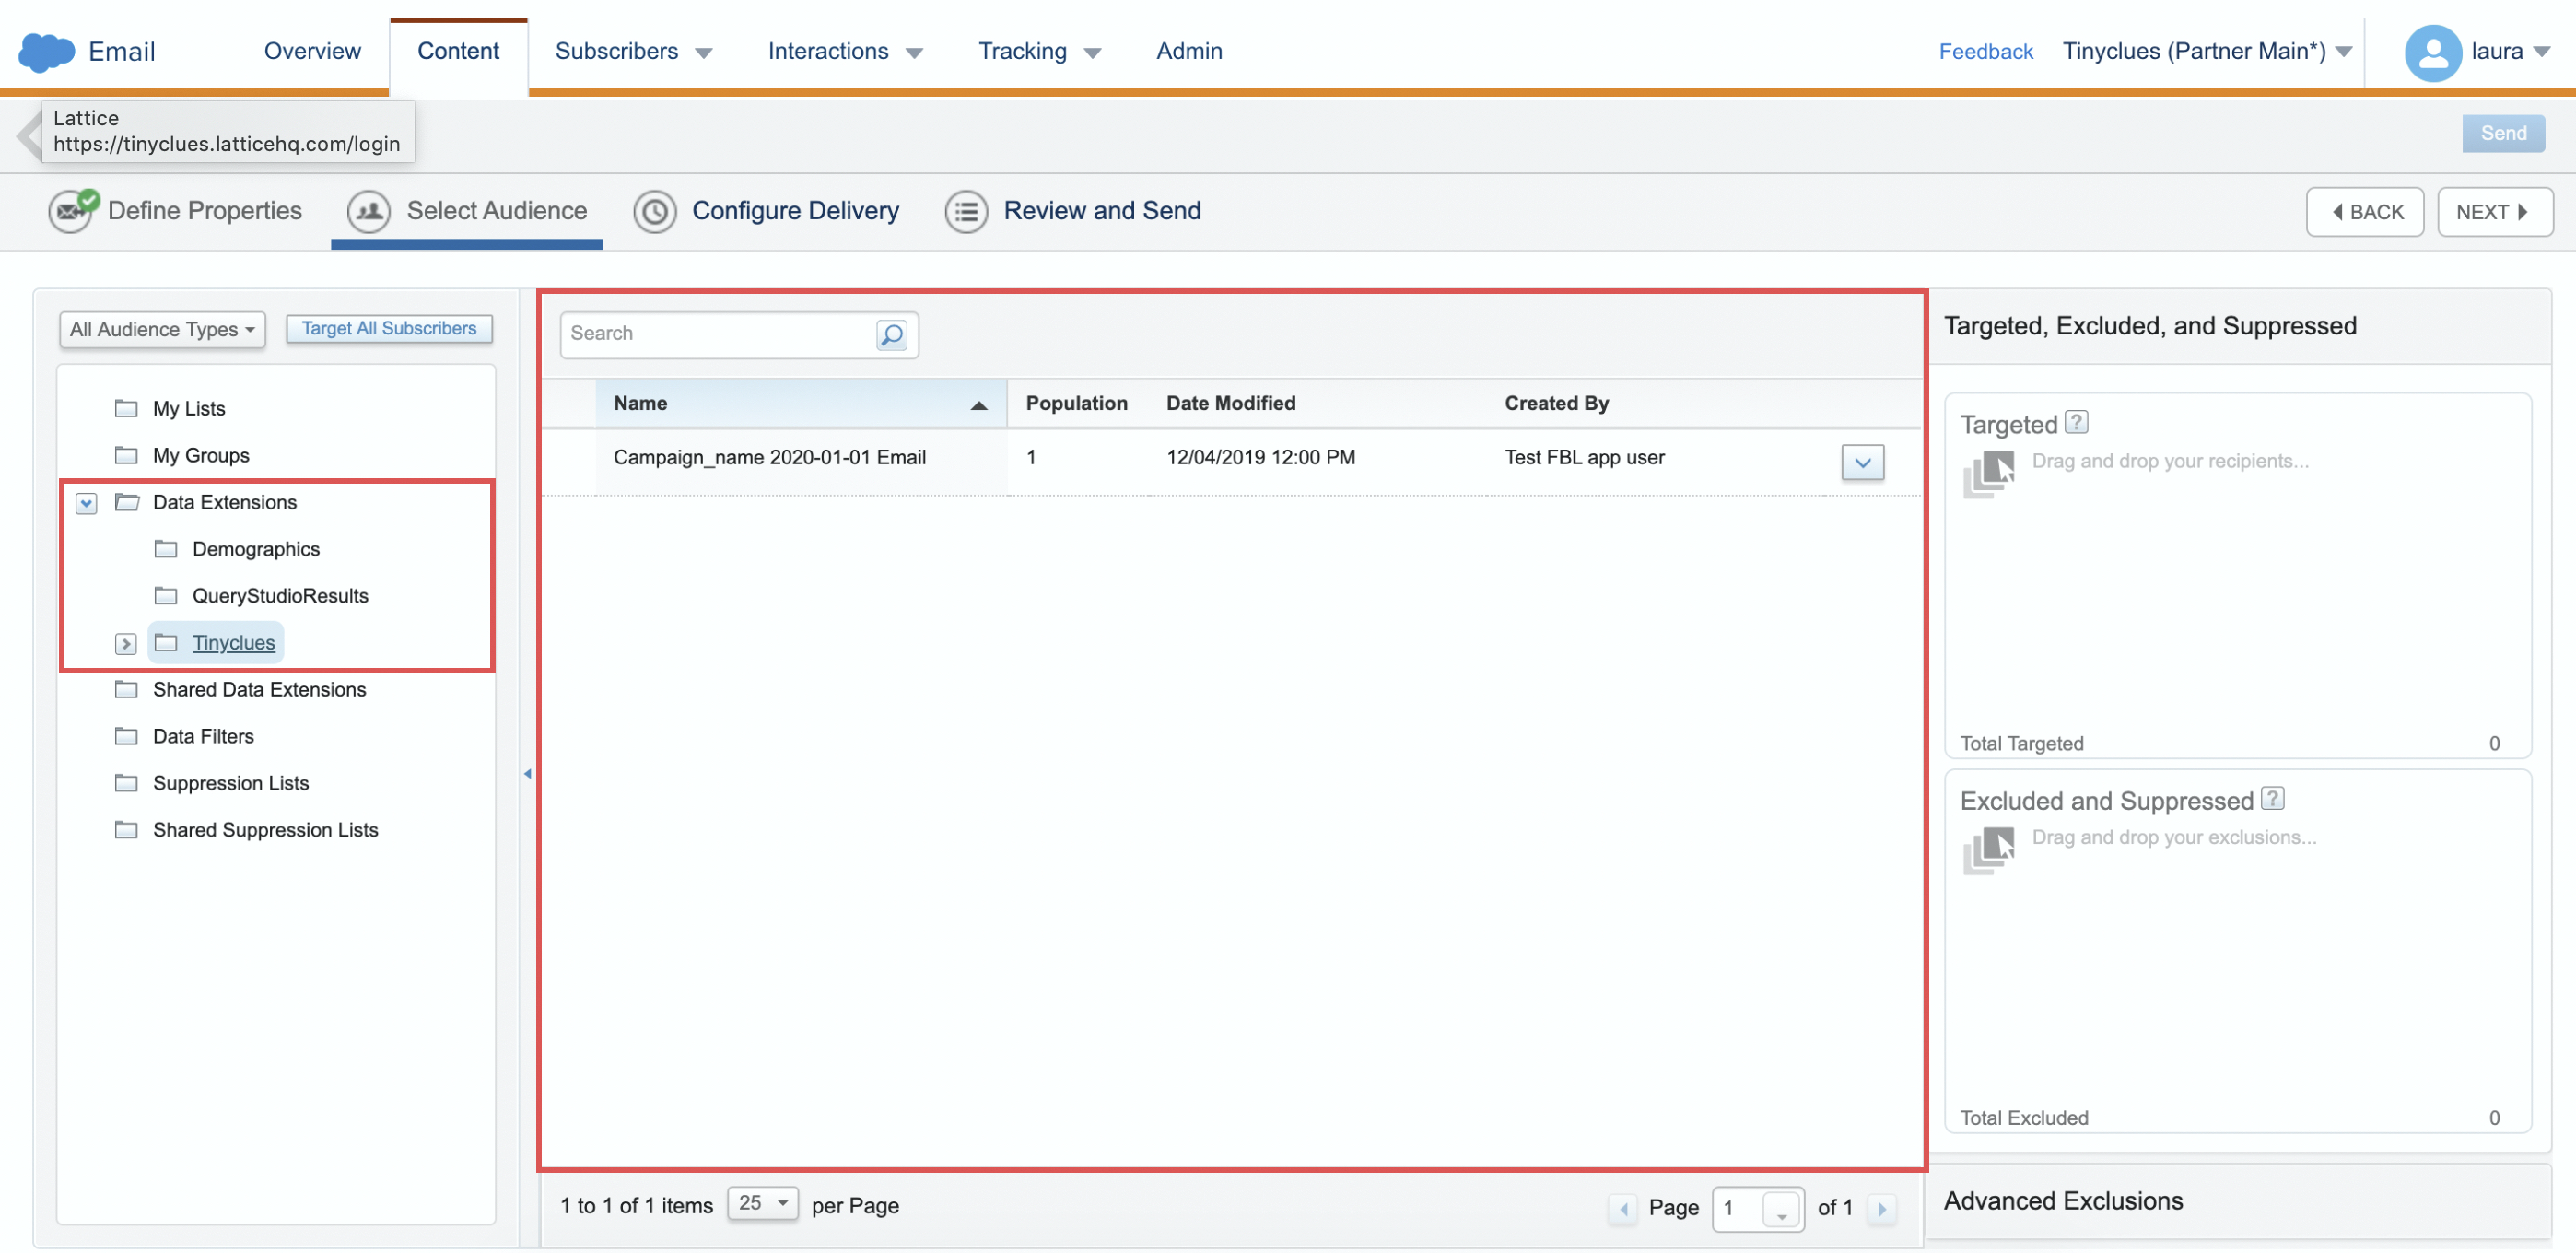
Example of the Splio Data Extension in Salesforce Marketing Cloud
Setup
- ENABLE API INTEGRATION
To be able to send your Salesforce Marketing Cloud account the right audiences, our platform needs to be able to access both Automation and Data extension modules through API calls. In order to allow those operations, you will need to go through the following steps:
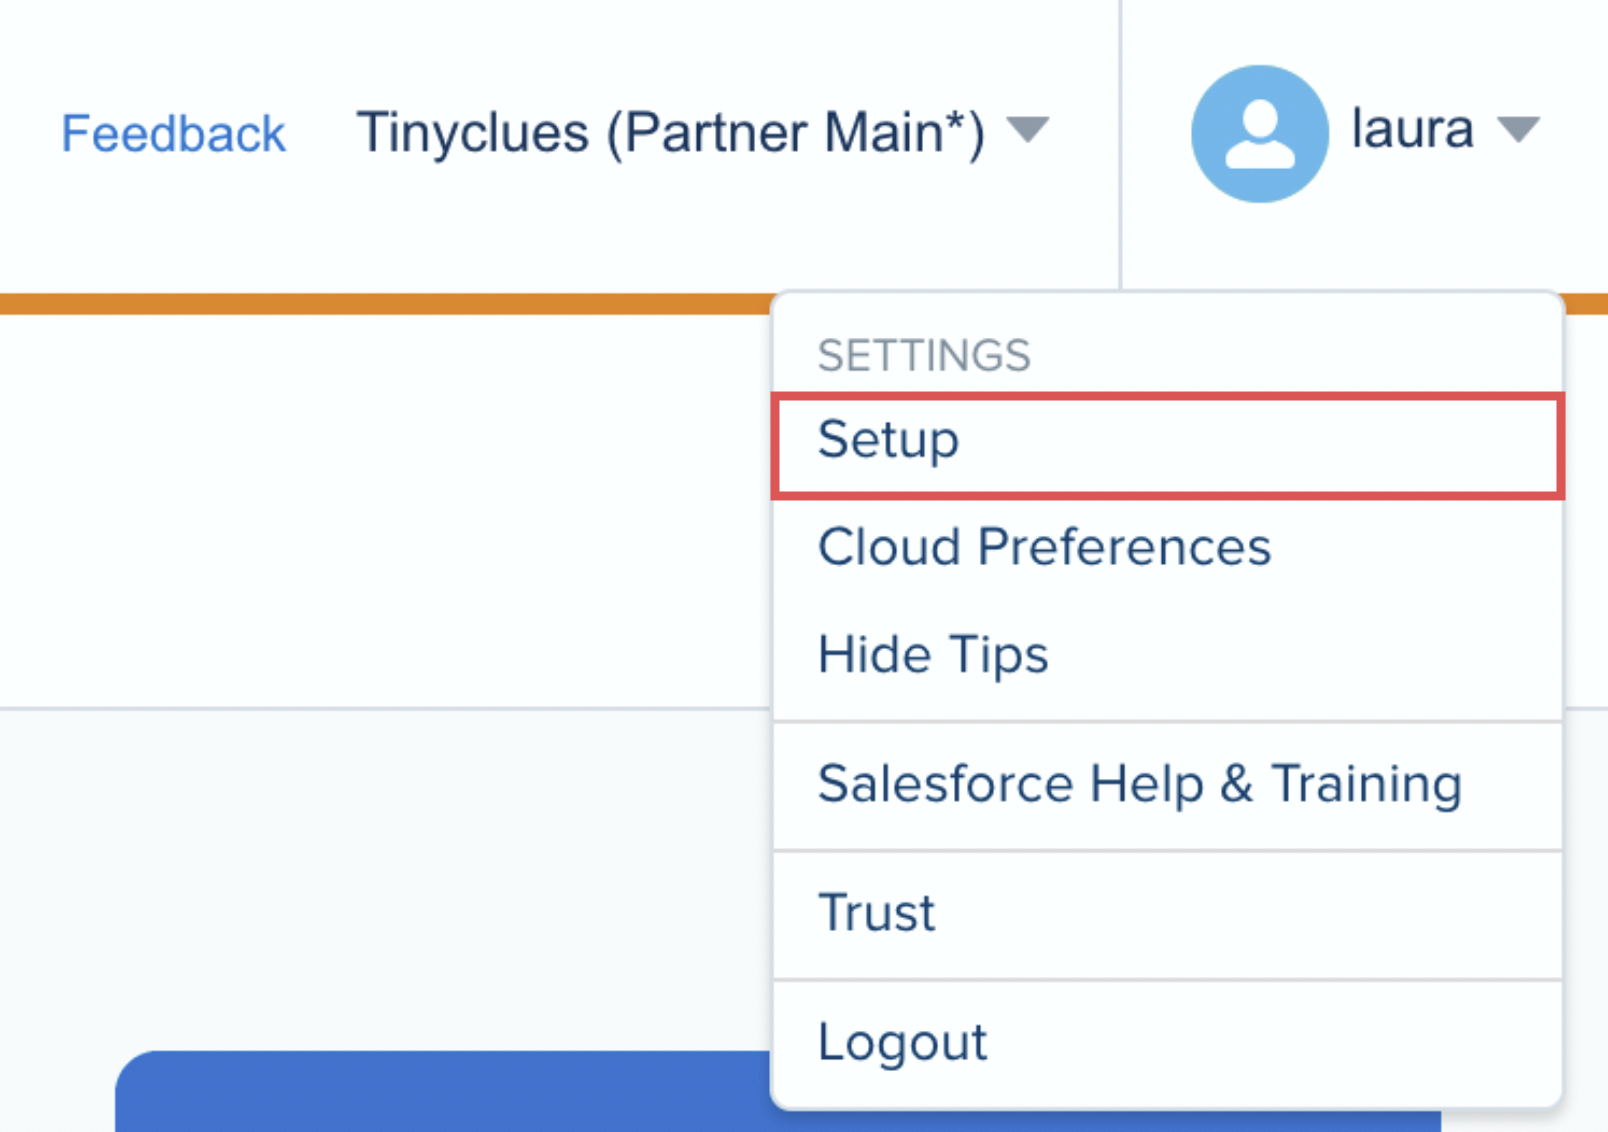
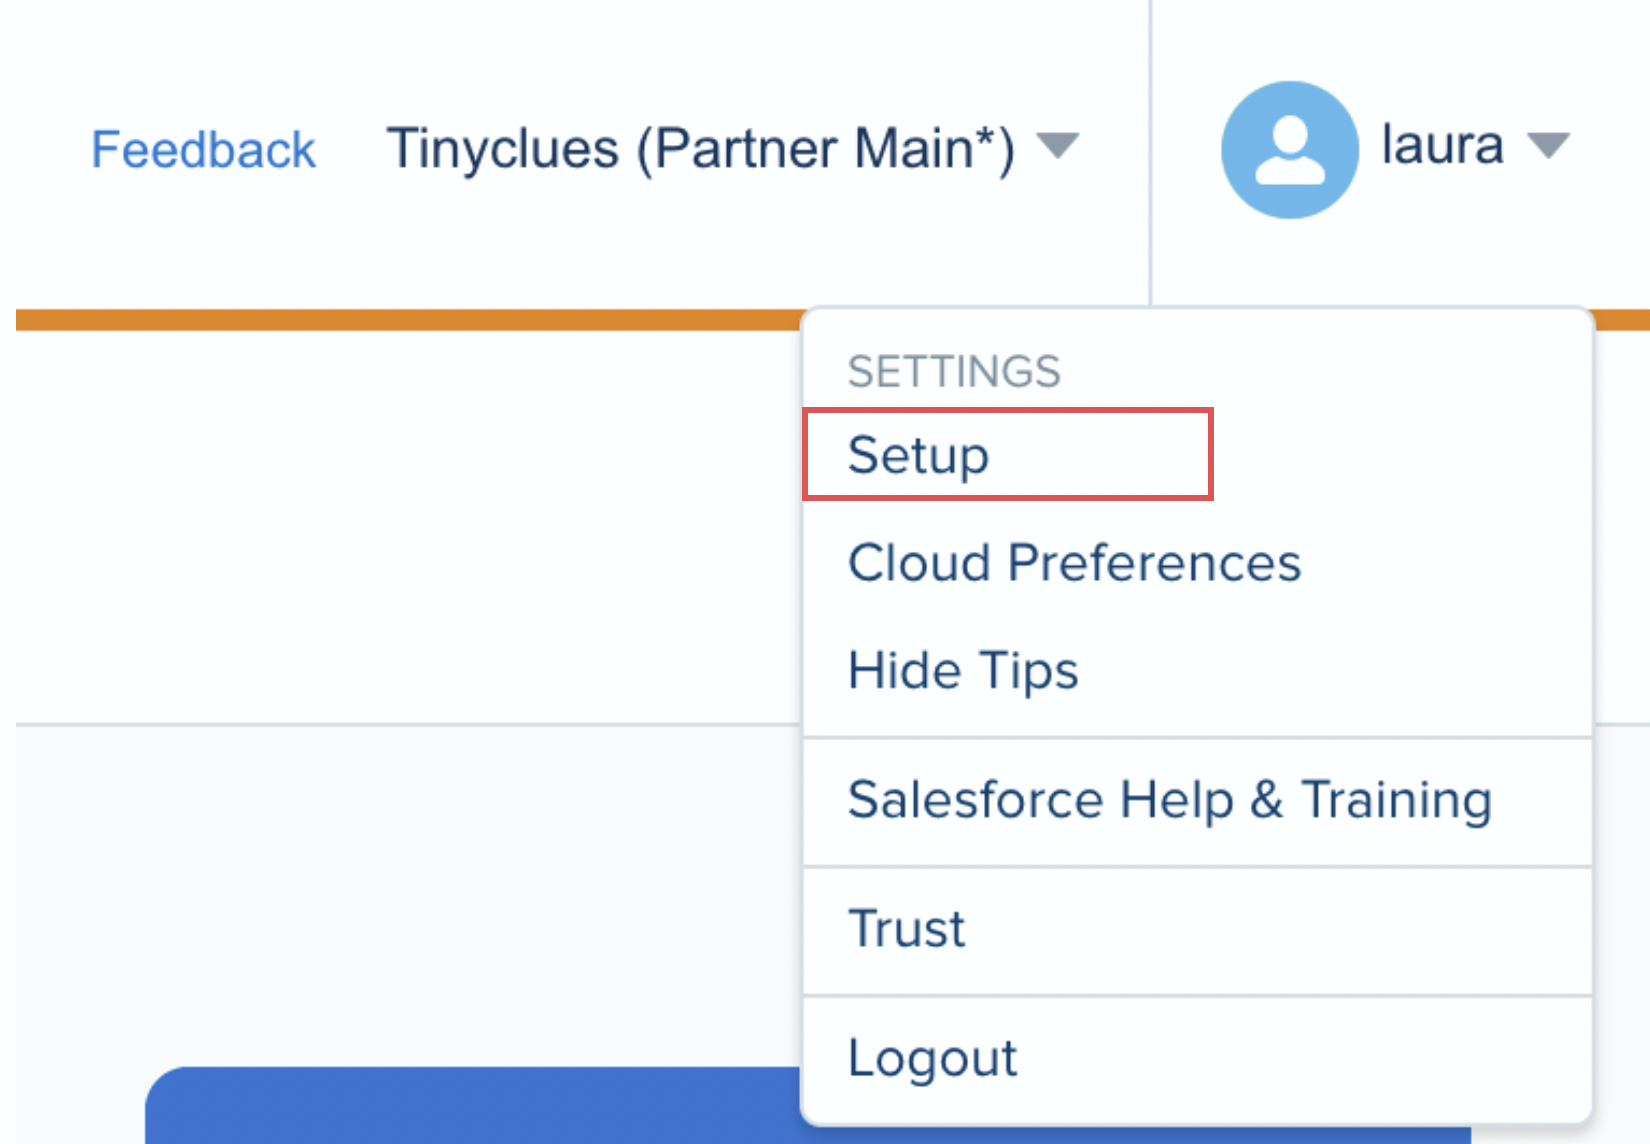
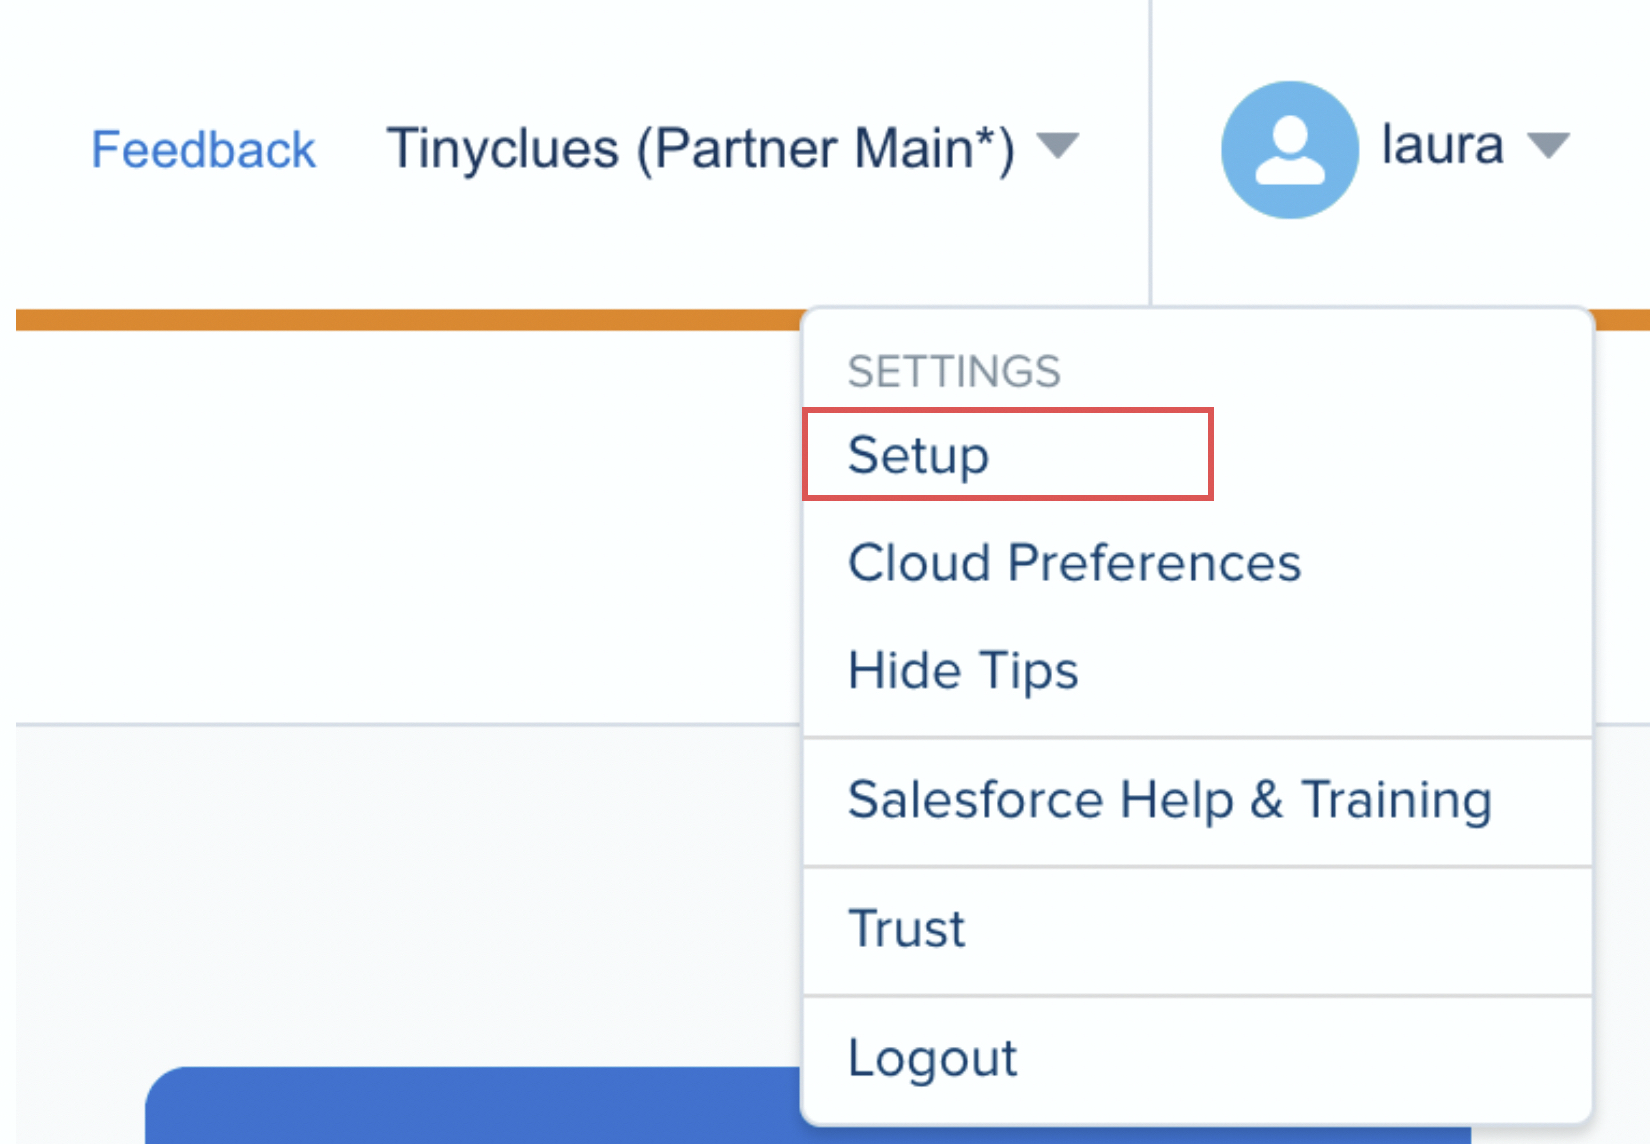
- Go to Settings → Setup → App → Installed Packages
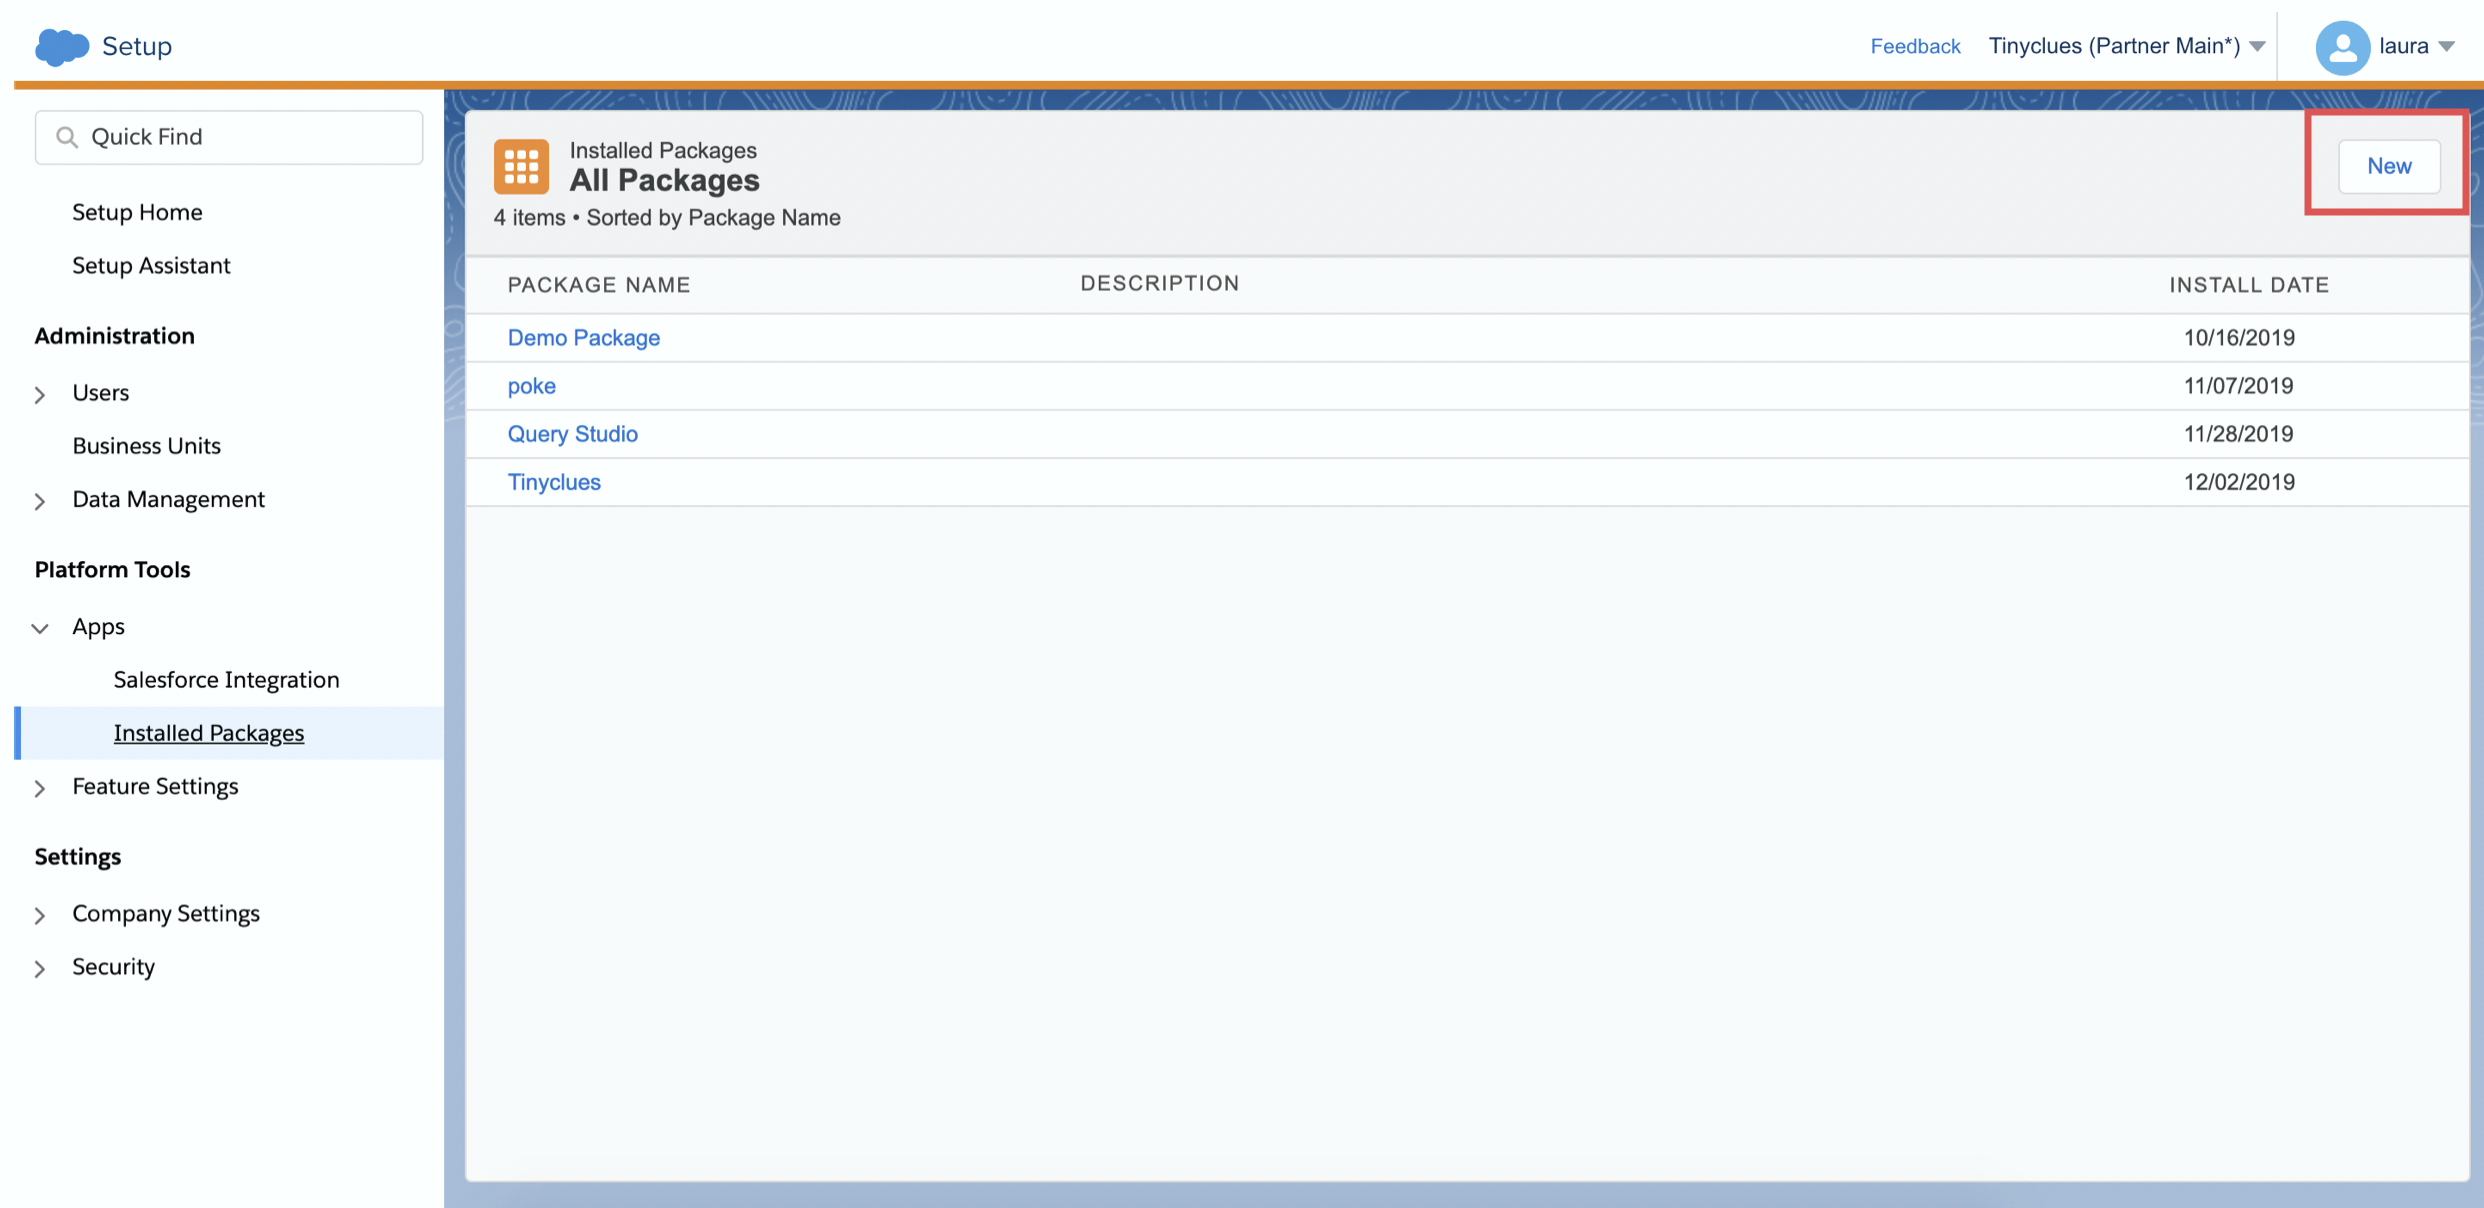
- Add a New package.
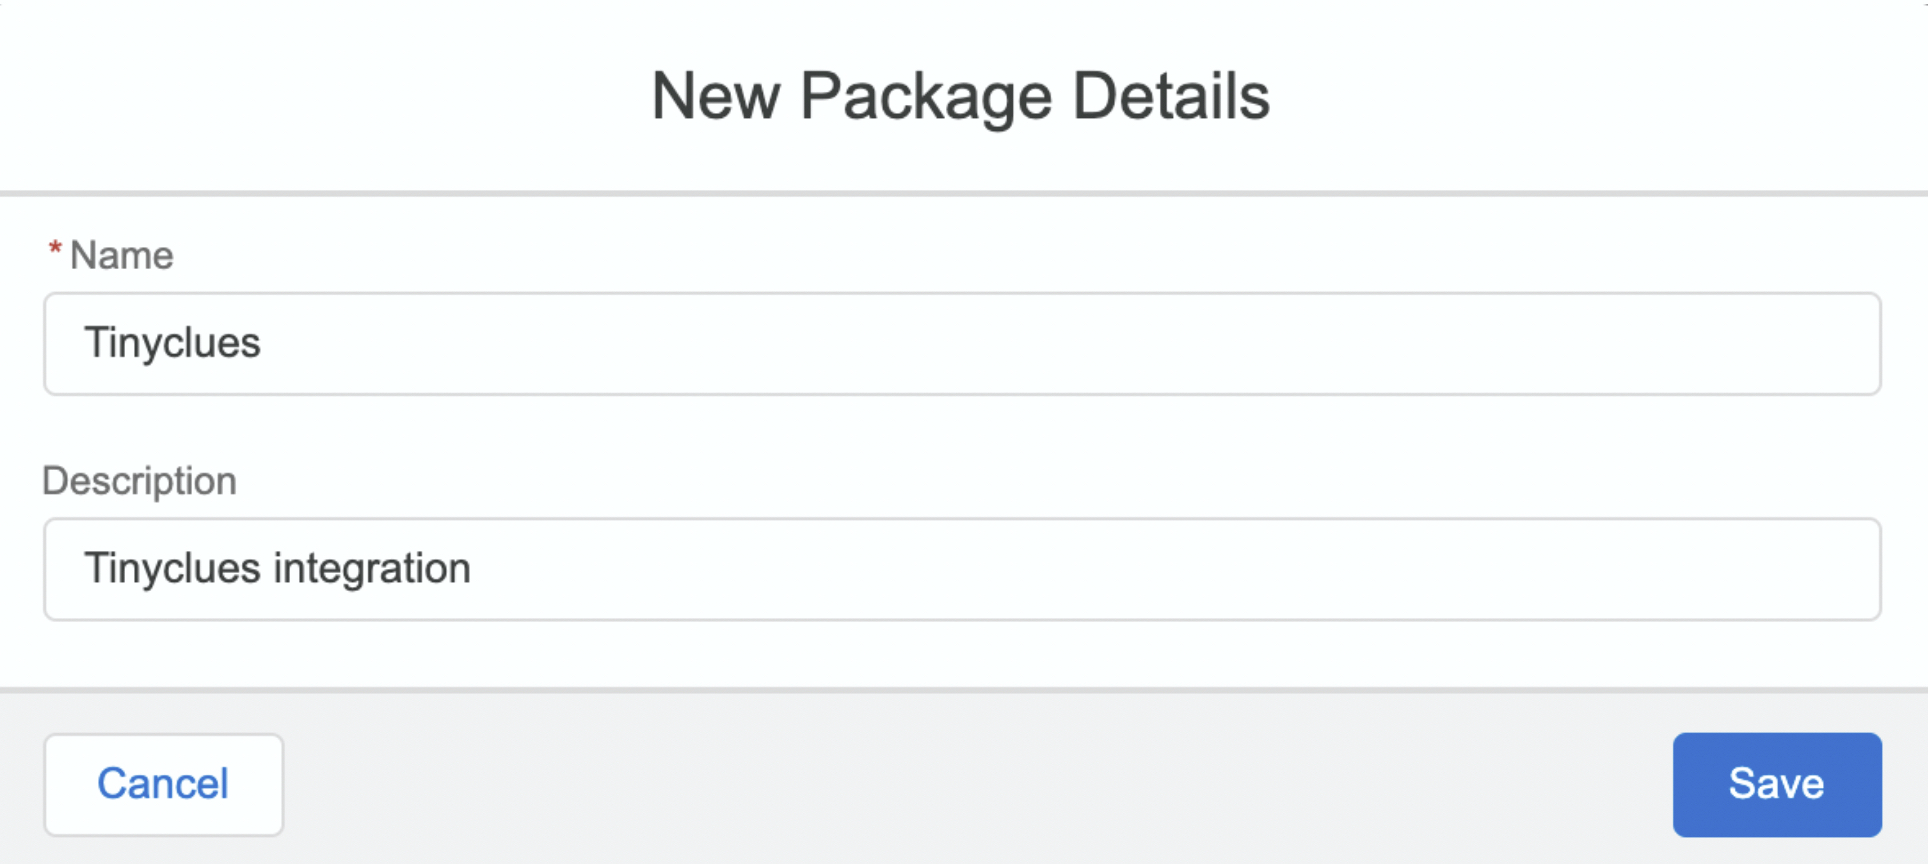
- Fill out the form and click Save.
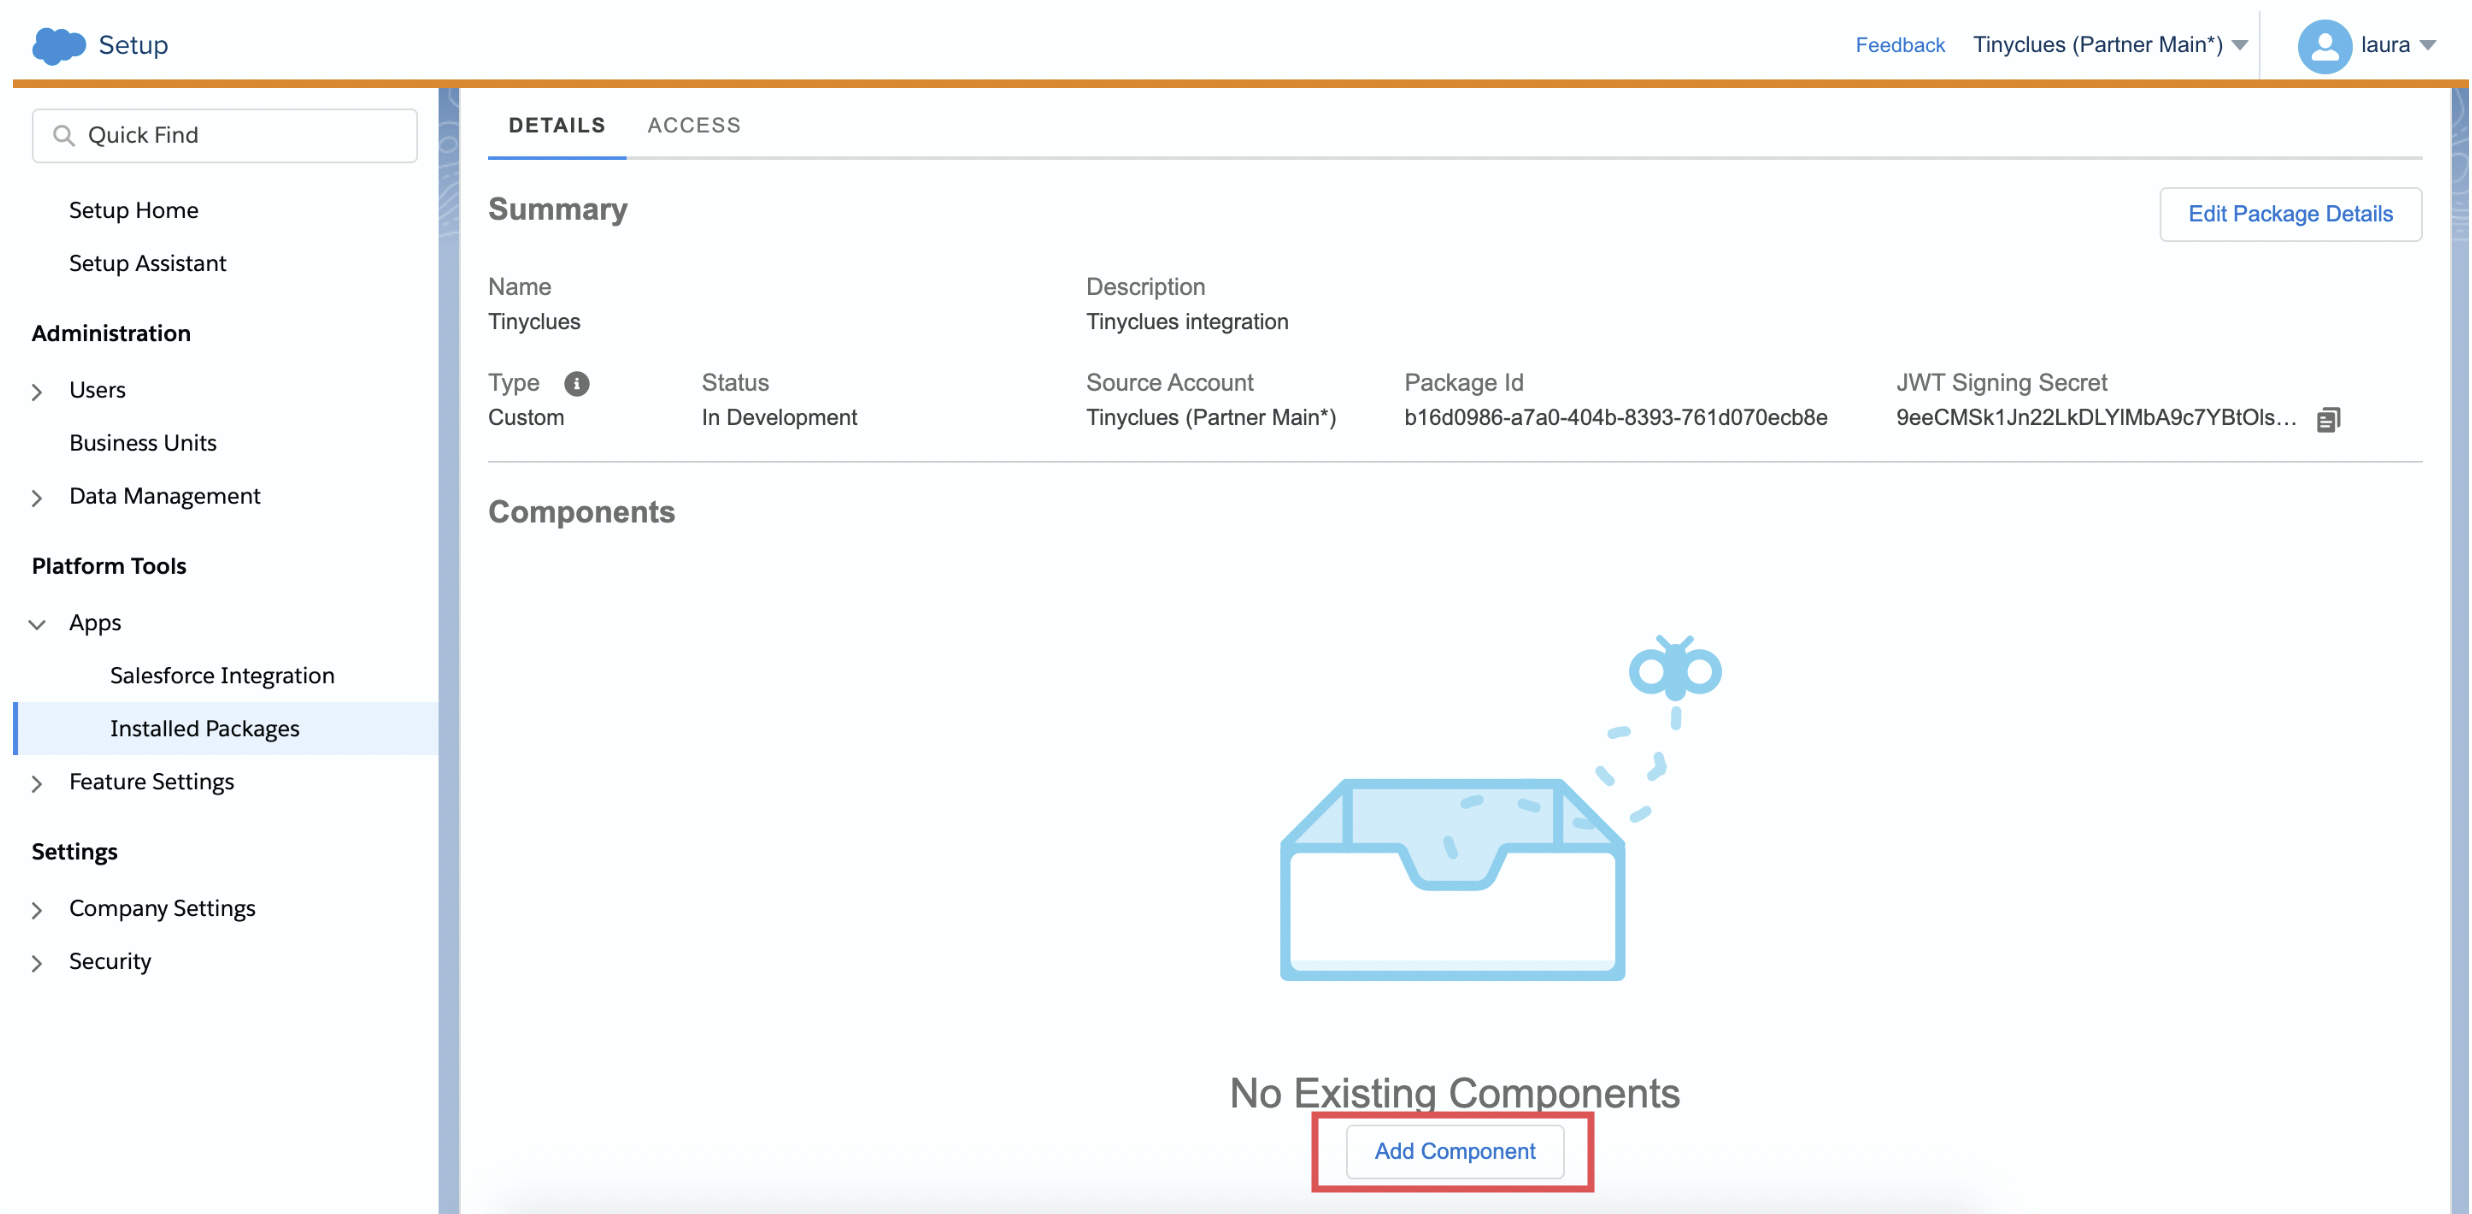
- Now that you're in your new Package, click on Add Component at the bottom of the page.
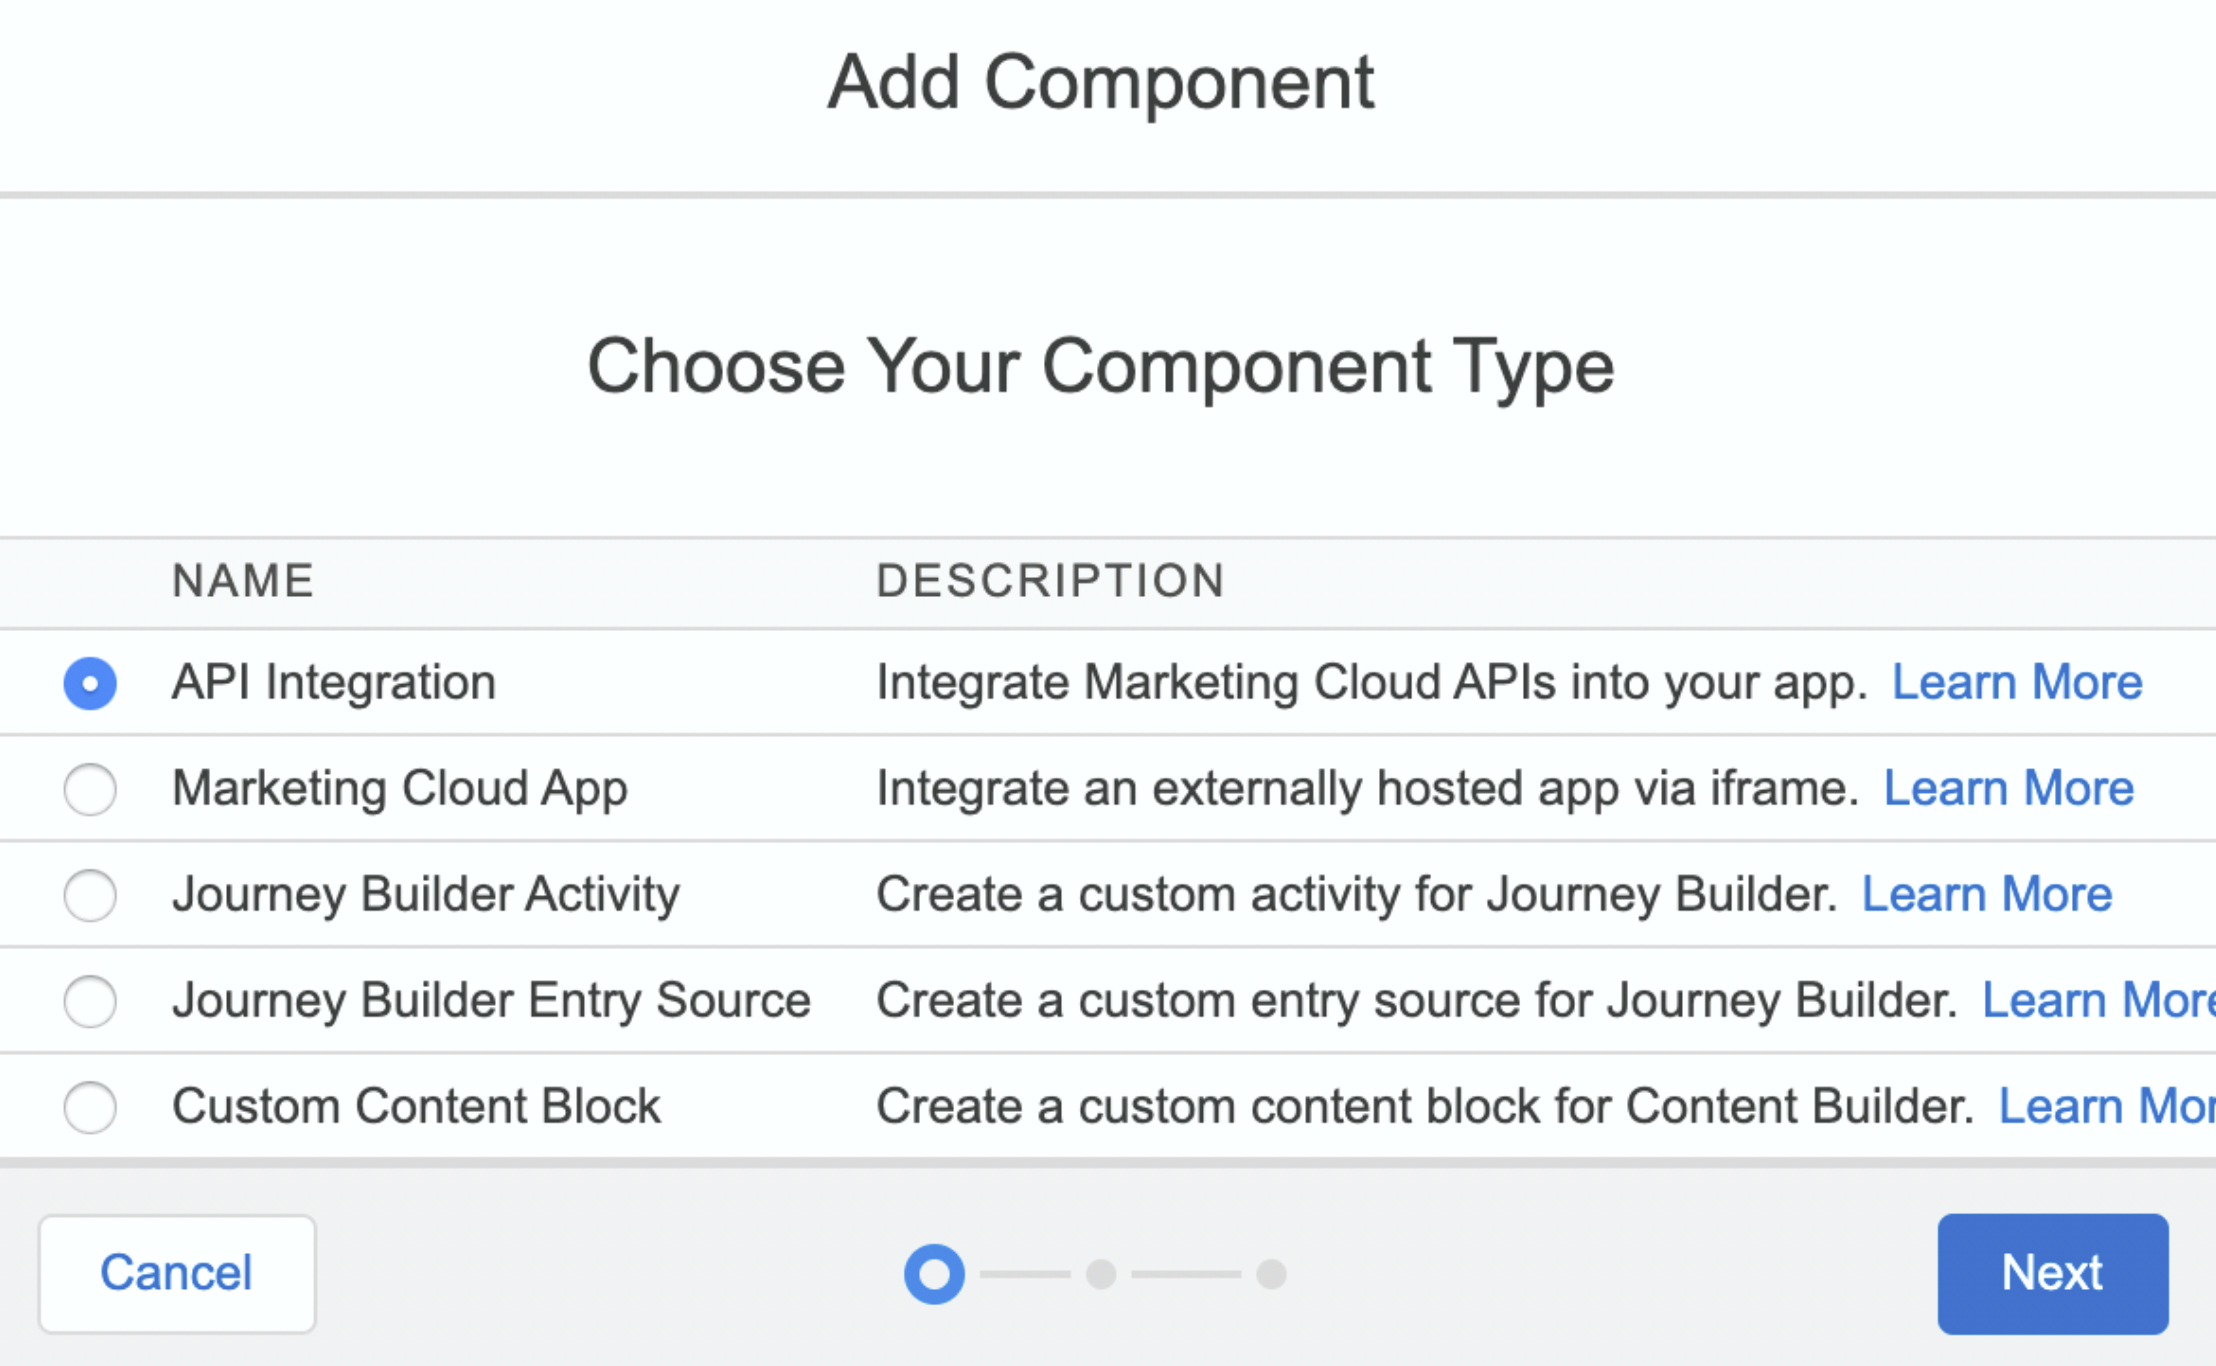
- Select API Integration as your Component Type and click Next.
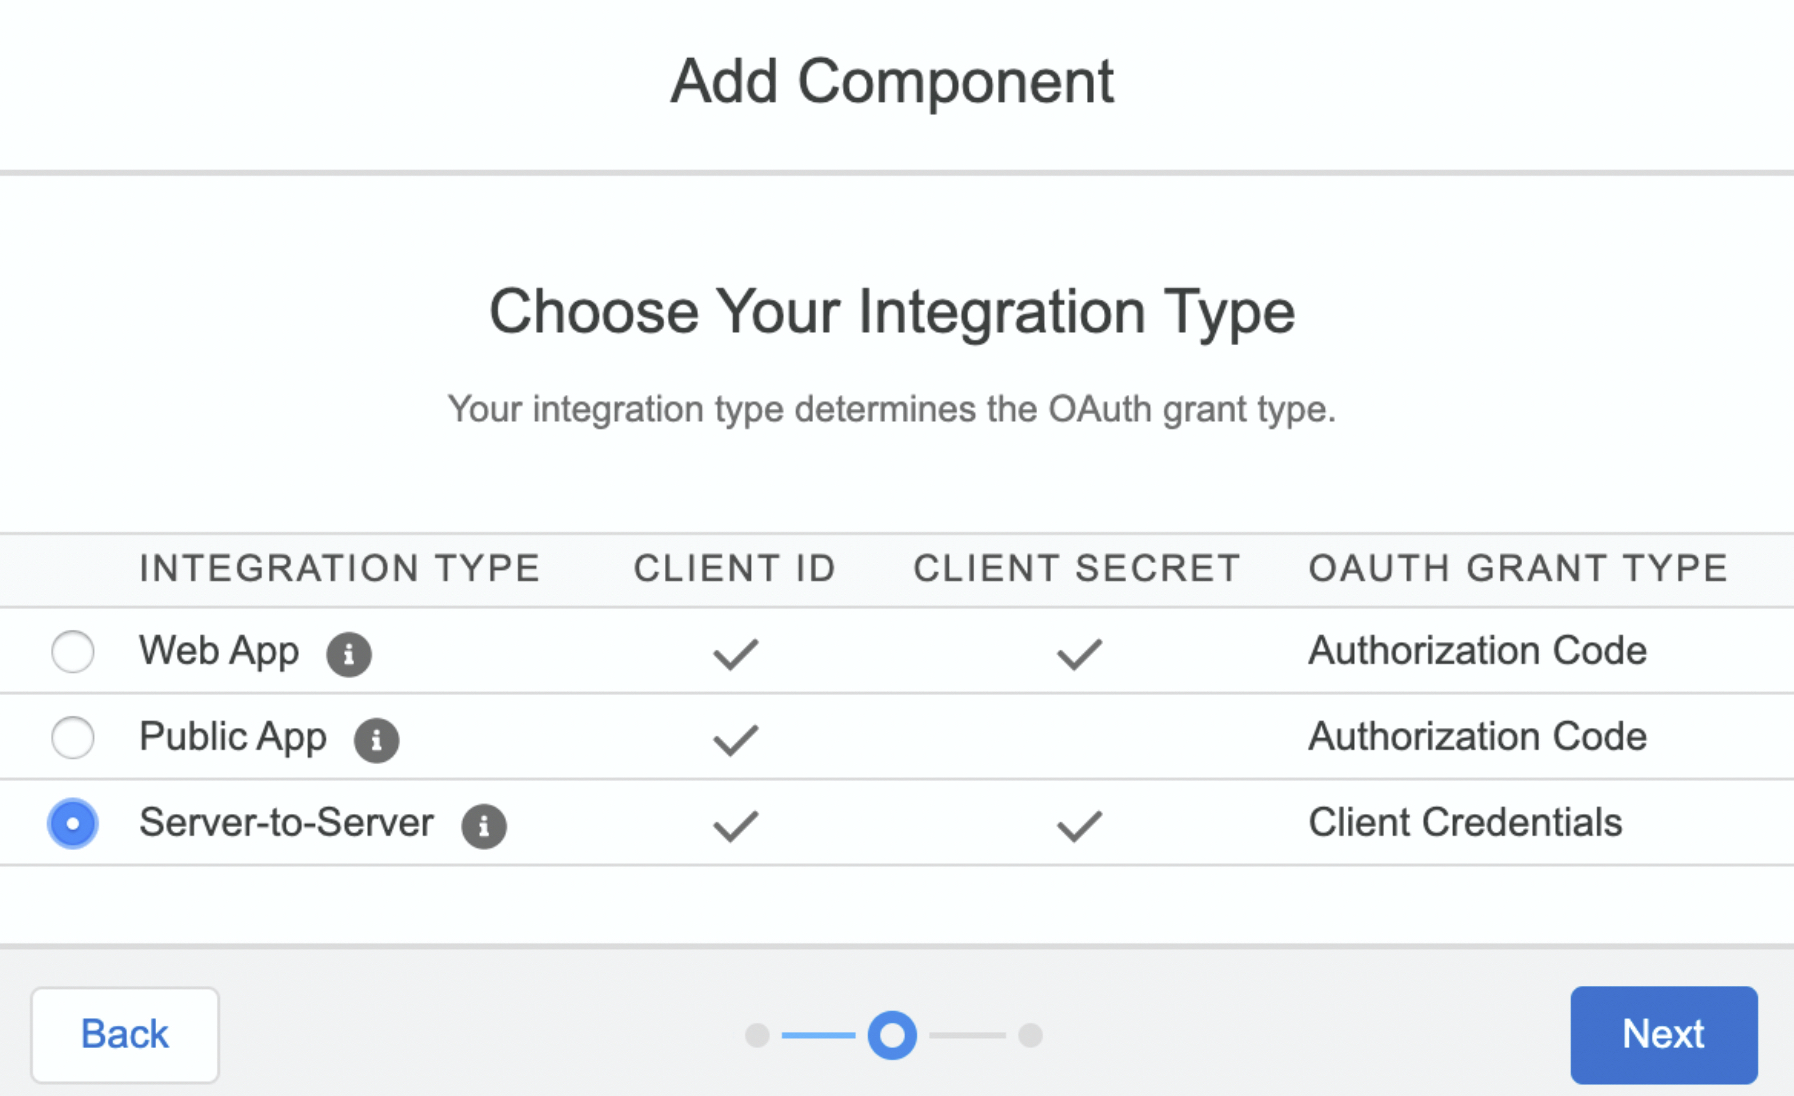
- For the Integration Type, select Server-to-Server and click Next.
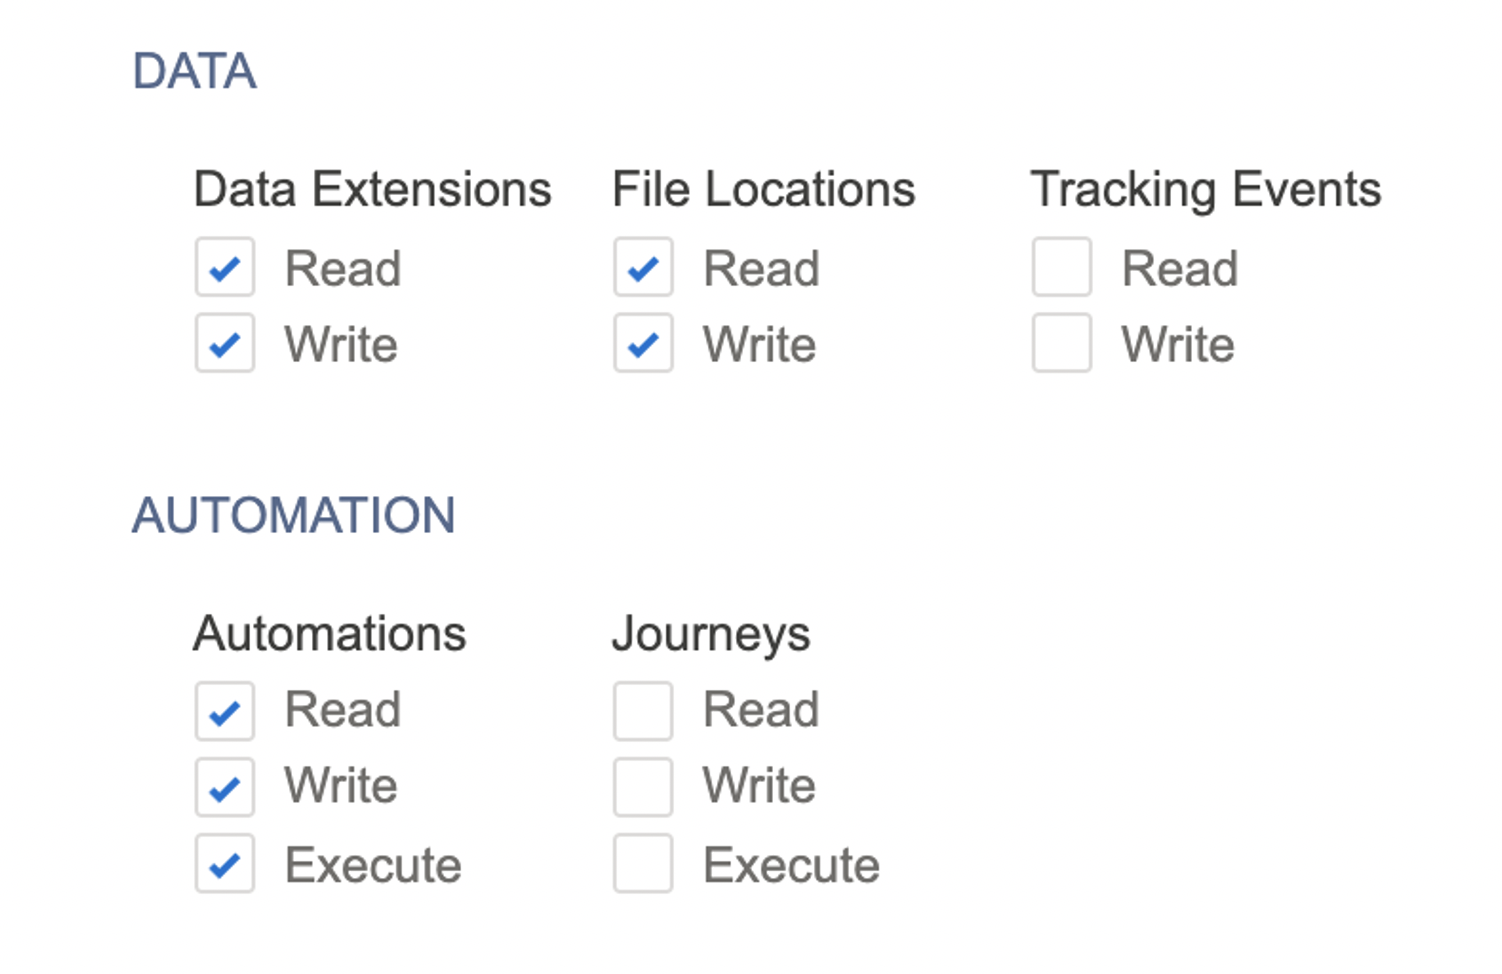
- Tick off the following permissions:
- Automation - Read/Write/Execute permission
- Data Extension - Read/Write permission
- File Locations - Read/Write permission
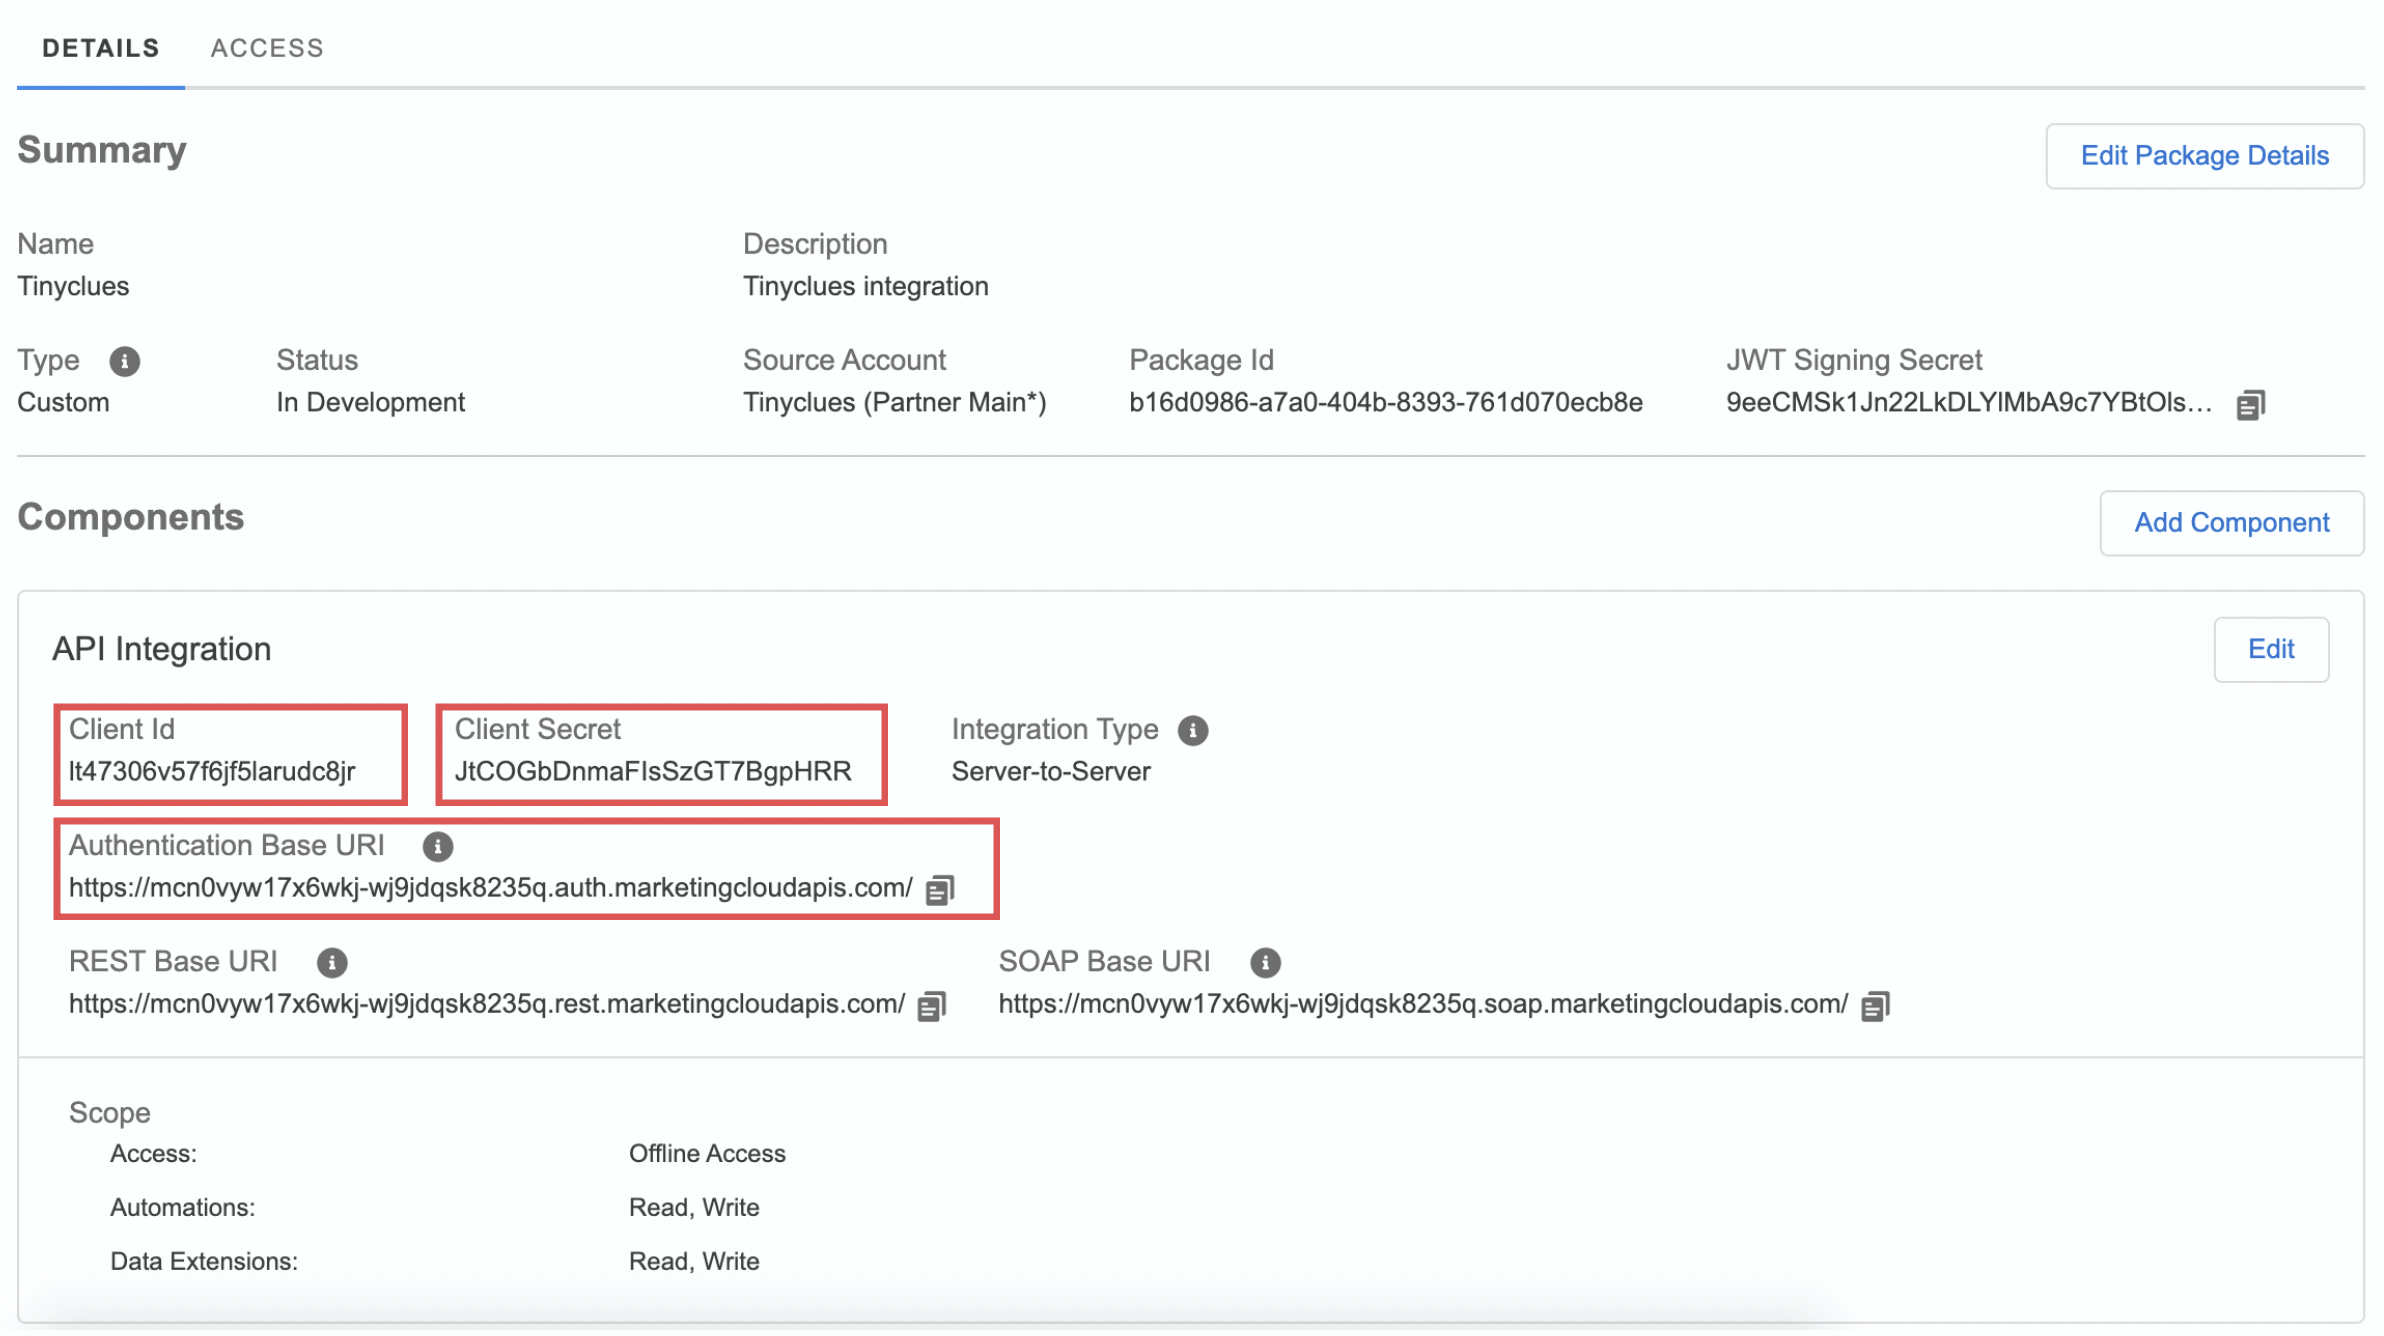
- Click Save. You can now provide Tinyclues with the information needed to communicate with your Salesforce Marketing Cloud account:
- Client ID
- Client Secret
- Authentication Base URL
- CONFIGURE AUTHENTICATION KEY AND FILE LOCATION
In addition to granting Splio API access, we also need your Salesforce Marketing Cloud account to be able to access our sFTP and retrieve your audiences. This can be done with an Access Key.
Create an Access Key:
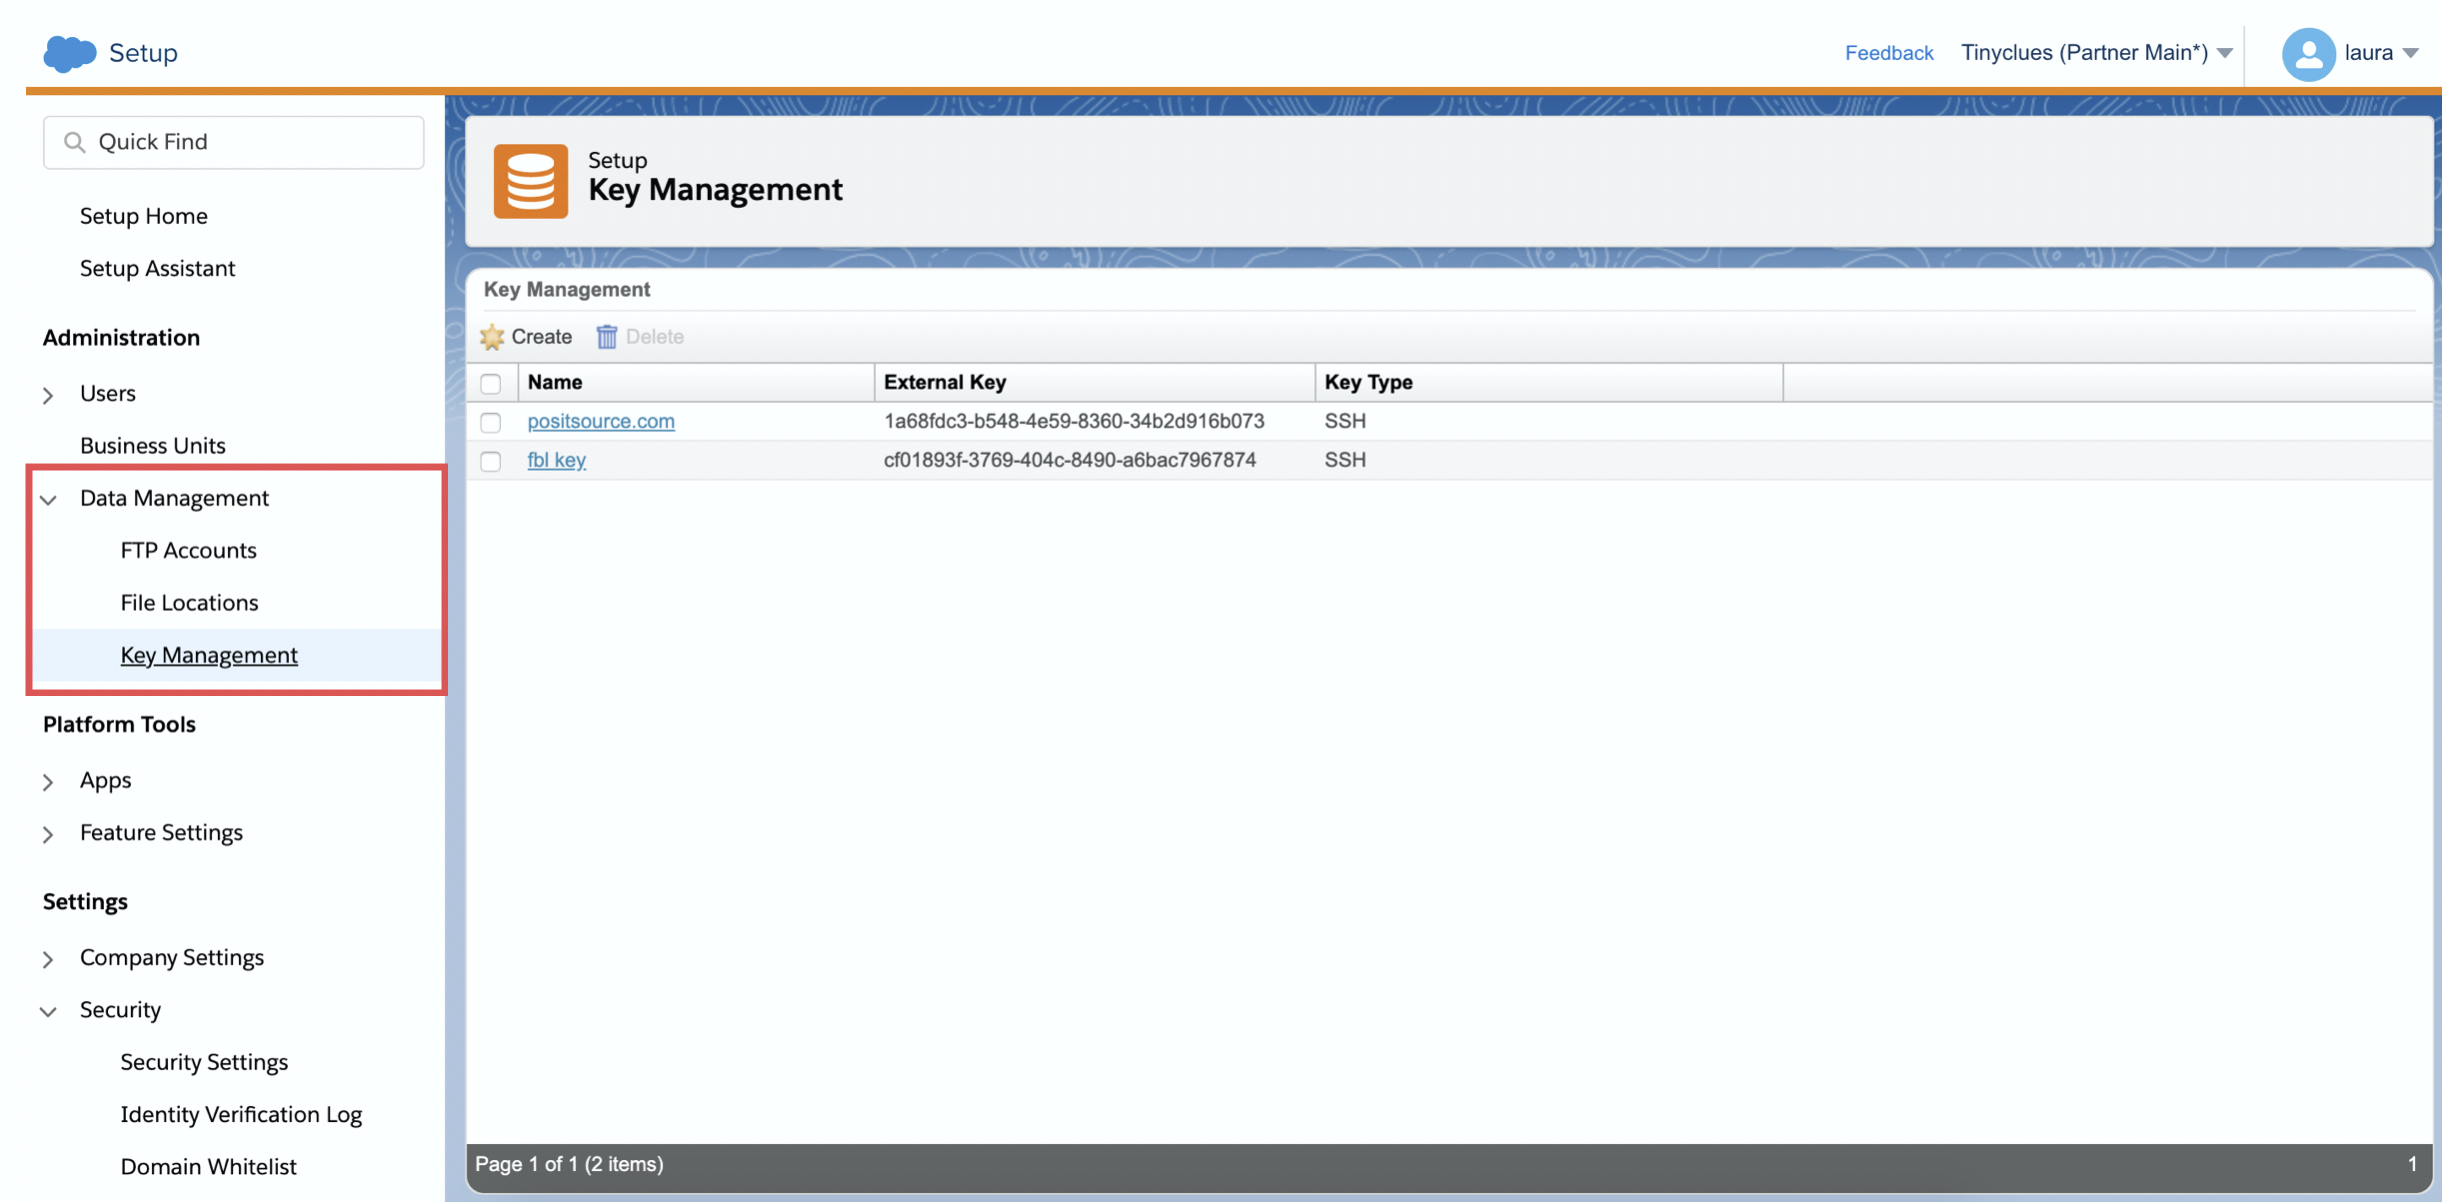
- Go to: Settings → Setup → App → Key Management.
- Click Key Management on the left side and then Create.

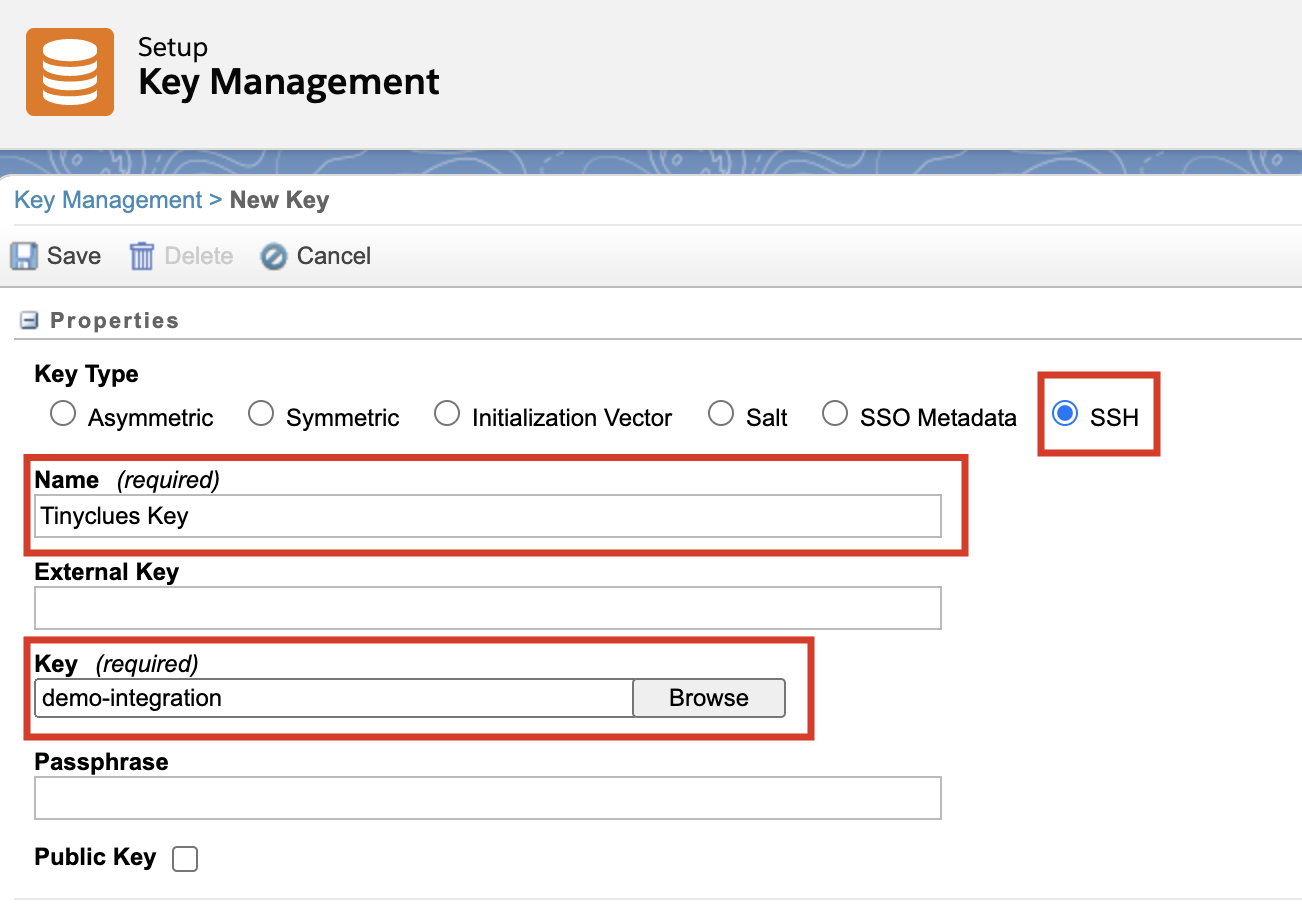
- Fill out the form and click Save.
- Key Type: SSH
- Name: Tinyclues Key
- Key: Private – do not tick the “Public Key” box
Please note: if your key is not in SSH format (for ex: a .txt or .ppk file), you can convert it into SSH. Learn more in this article.
Configure file location
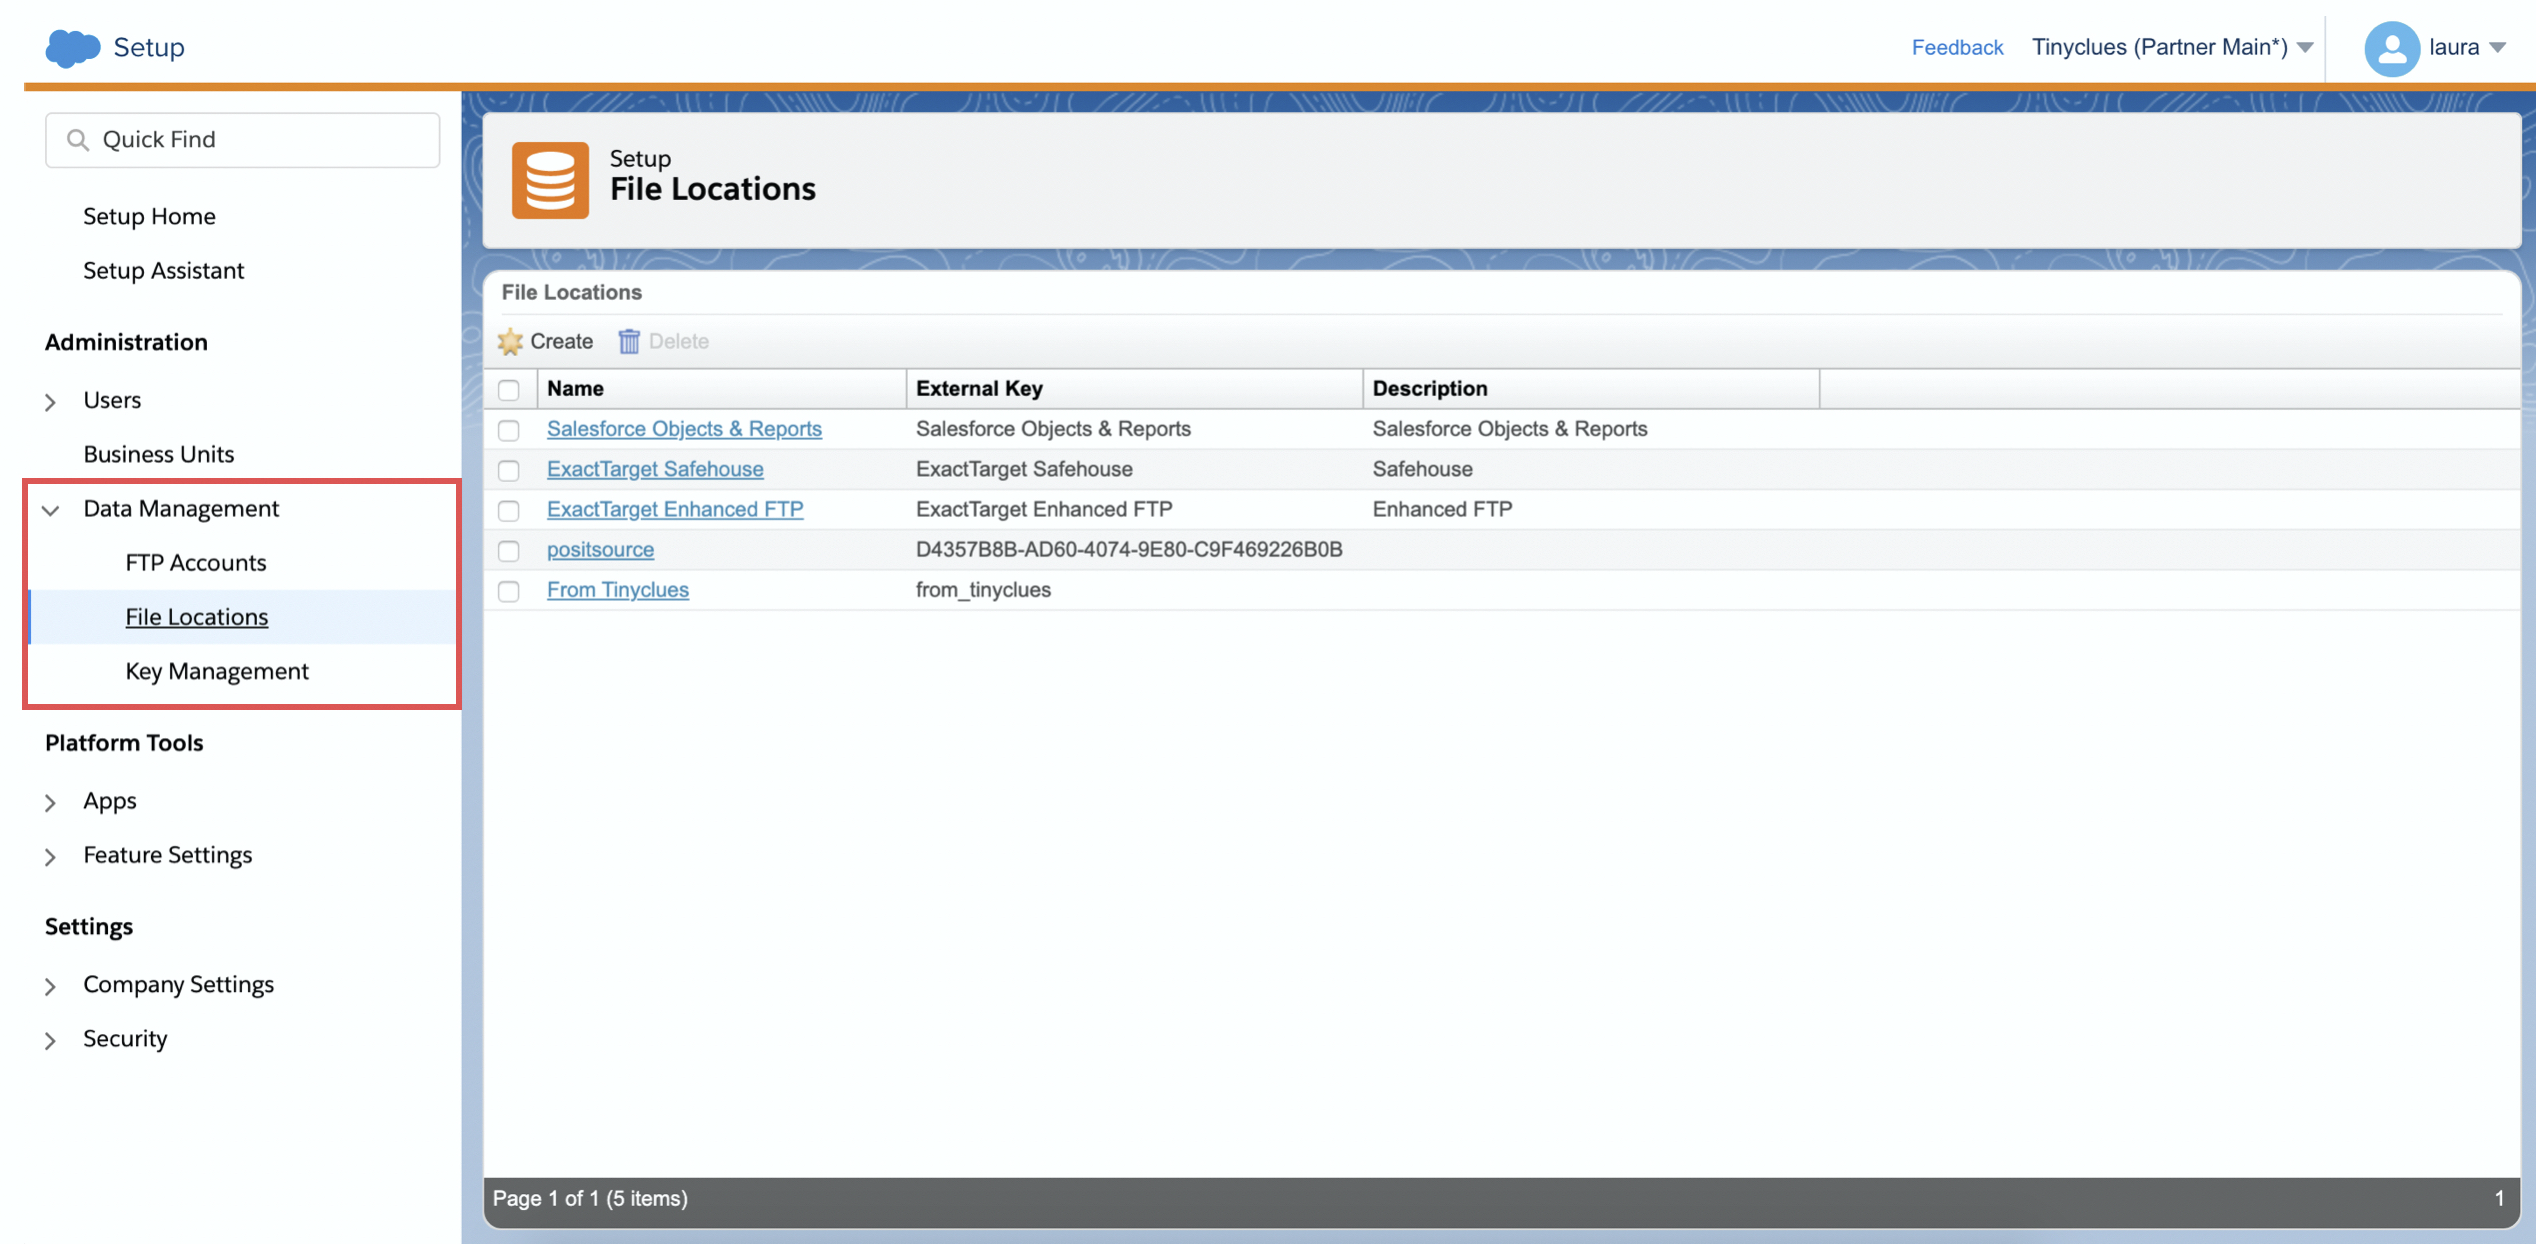
- Go to Settings → Setup → App → File Location.
- Click File Location on the left side and then click Create.
- Fill out the form and click Save.
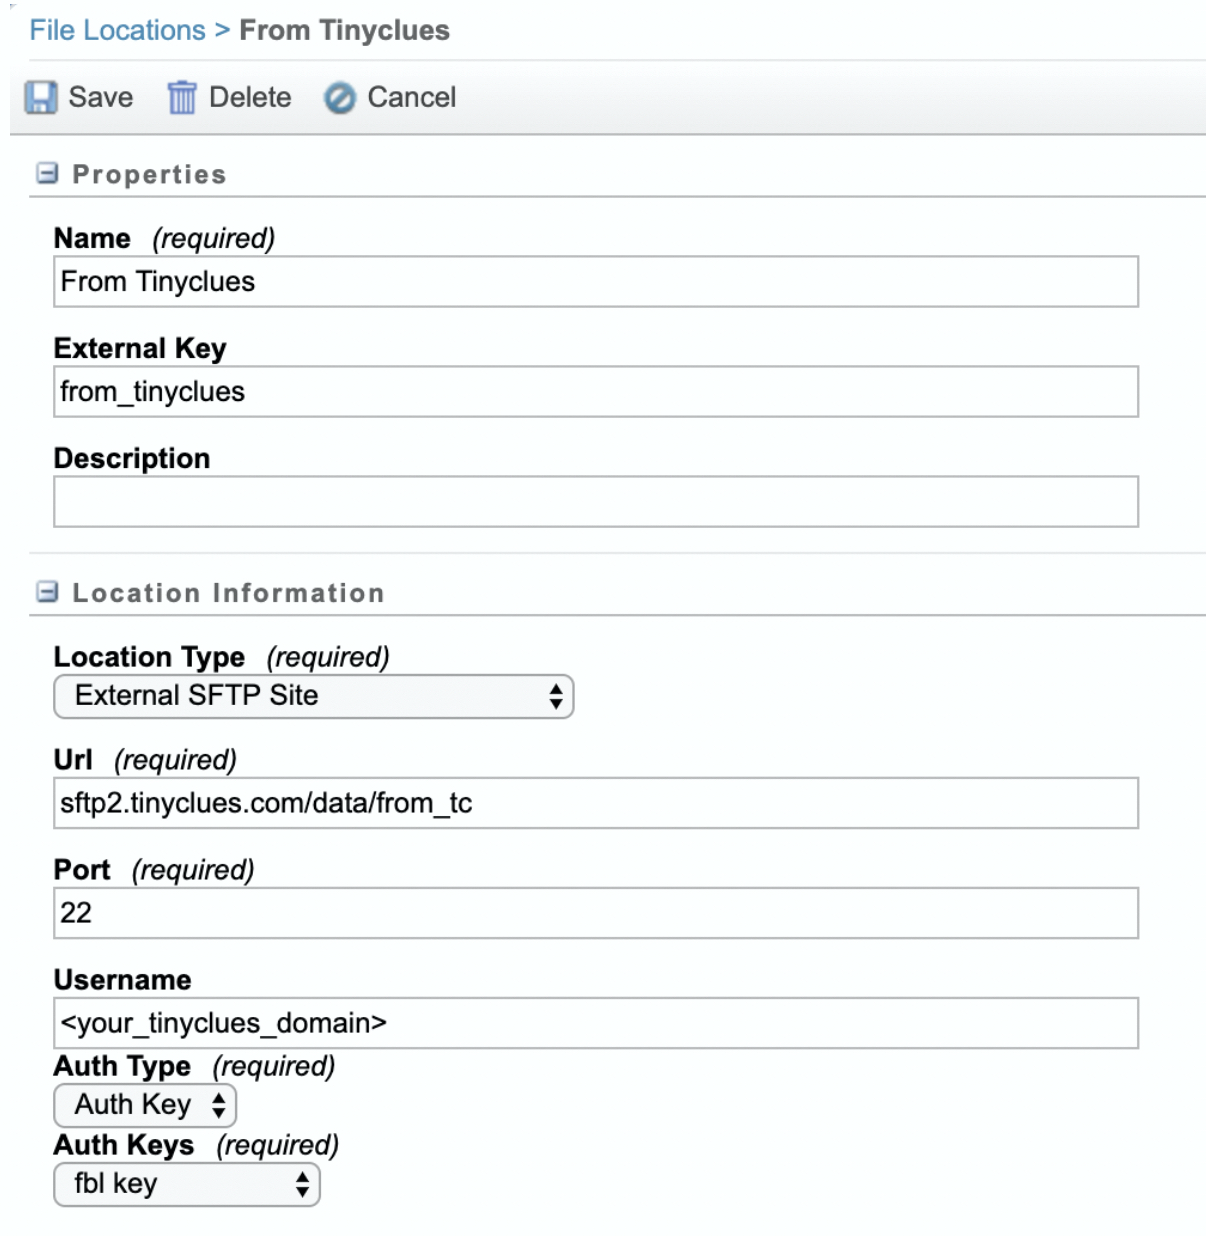
- Name: From Tinyclues
- External Key: from_tinyclues
- Location Type: External SFTP Site
- URL: sftp2.tinyclues.com/data/from_tc
- Port: 22
- Username: Your Splio domain name as provided by your Data Ops representative
- Auth Type: Auth Key
- Auth Keys: Select the one configured above.
You should now have:
✅ Created a new package
✅ Added a new API component
✅ Created the information Tinyclues requires: Client ID / Client Secret / Authentication Base URL
✅ Created an Access Key
✅ Created a File Location
Updated 5 months ago