Integrate to your Shopify
🕛 Integration time : ~2 hours
General overview
Integrating Splio's Loyalty SDK into your Shopify site allows seamless integration of loyalty program such as rewards, points, and tiers. With the SDK you don't need to build a custom integration through APIs. It also offers detailed analytics to track customer engagement and inform business decisions. Note that our Shopify app will let you easily sync your Shopify Data to Splio to get the most of Splio Platform.
You can read more on the general principles of the Loyalty Web Kit here.
1. User authentication
In Shopify authentication is done using HMAC-SHA256 algorithm using an API Key. The token is built from the content parameter and will be decrypted by the SDK to retrieve users' information or create & subscribe the users in Splio.
It must contain at least the following keys:
- `universe`: ID of the universe (mandatory)
- `configuration_id`: Configuration ID as defined in sp-ring (mandatory)
- `external_id`: unique key set on Splio (unique SPlio should be also know by Shopify)
- `email`: Email of the user
- `card_code`: If your loyalty program doesn’t automatically generate card_code, this parameter is mandatory.
- `list_ids`: If you want a user to be optin to some lists when he is created. This value is set on user creation, and cannot be updated later through the SDK. Exemple: `list_ids=3,4,16`
- `lang`: navigation lang of the user
Below is an exemple:
universe=pophat&program_id=7&[email protected]&[email protected]&list_ids=3,4,162. Embed the Loyalty SDK to your Shopify
2.1 Create your liquid template
- Make sure you have all the assets from Splio needed in the below liquid example.
- Create a json metafield containing a map beetween the lang you support and the associated configuration id and api key. Here is an example:
{
    "fr":
    {
        "id": "3",
        "apiKey": "458aadefee58462758634218e5928894761a021b0225758aab76ee3dcb209107"
    },
    "en":
    {
        "id": "527",
        "apiKey": "aitarshhaarararblaaafsaaatgfkfmaaabcduaaowwfkkpmauahlxprlrlvrcaf"
    }
}- Create liquid template (ie. named loyalty_sdk_page) on Shopify admin panel > Customize > Edit Code > Create a new template
- Paste the liquid code below and replace the variables with your own data (universe & configuration_id). Also please note that in this example the email is the externalId. It might not be the case for your universe)
<div>
  <script>
    {% capture content %}universe=pophat&configuration_id={{page.metafields.splioSDK.configurationsMap.value[localization.language.iso_code].id}}{% if {{customer.id != null}} %}&external_id={{ customer.id }}&email={{ customer.email }}&firstname={{ customer.first_name }}&lastname={{ customer.last_name }}{% endif %}{% endcapture %}
    window.addEventListener('splioSDK:loaded', function(event) {
      splioSDK.init({
        lang: "fr",
        authType: "sha256",
        authToken: "{{ content }}|{{ content | hmac_sha256: page.metafields.splioSDK.configurationsMap.value[localization.language.iso_code].apiKey }}",
        display: { mode: 'inline', container: '#splio-sdk'}
      });
    });
  </script>

  <div id="splio-sdk"></div>
  <link rel="stylesheet" id="link-css" href="https://static.splio.pro/sdk/web-sdk/v1/splio-web.css" type="text/css">
  <script type="module" crossorigin src="https://static.splio.pro/sdk/web-sdk/v1/splio-web.js"></script>

  <!-- Add Custom font and apply it to the Loyalty SDK -->
  <link href="https://fonts.googleapis.com/css2?family=Roboto:wght@400;700&display=swap" rel="stylesheet">
  <style>
    /* Uncomment this to apply the font
    .splio-display { font-family: 'Roboto', sans-serif !important; }
    */
  </style>
</div>Don’t forget using
type="module" crossoriginwhen importing the Javascript asset.
- Display options
Different display modes are available: inline, modal and widget. To display the UI rendered by the SDK in a modal, edit the liquid template, edit options display in splioSdk.init({}):
splioSdk.init({
  ...
  display: { mode: 'widget', container: '#splio-sdk'}
});
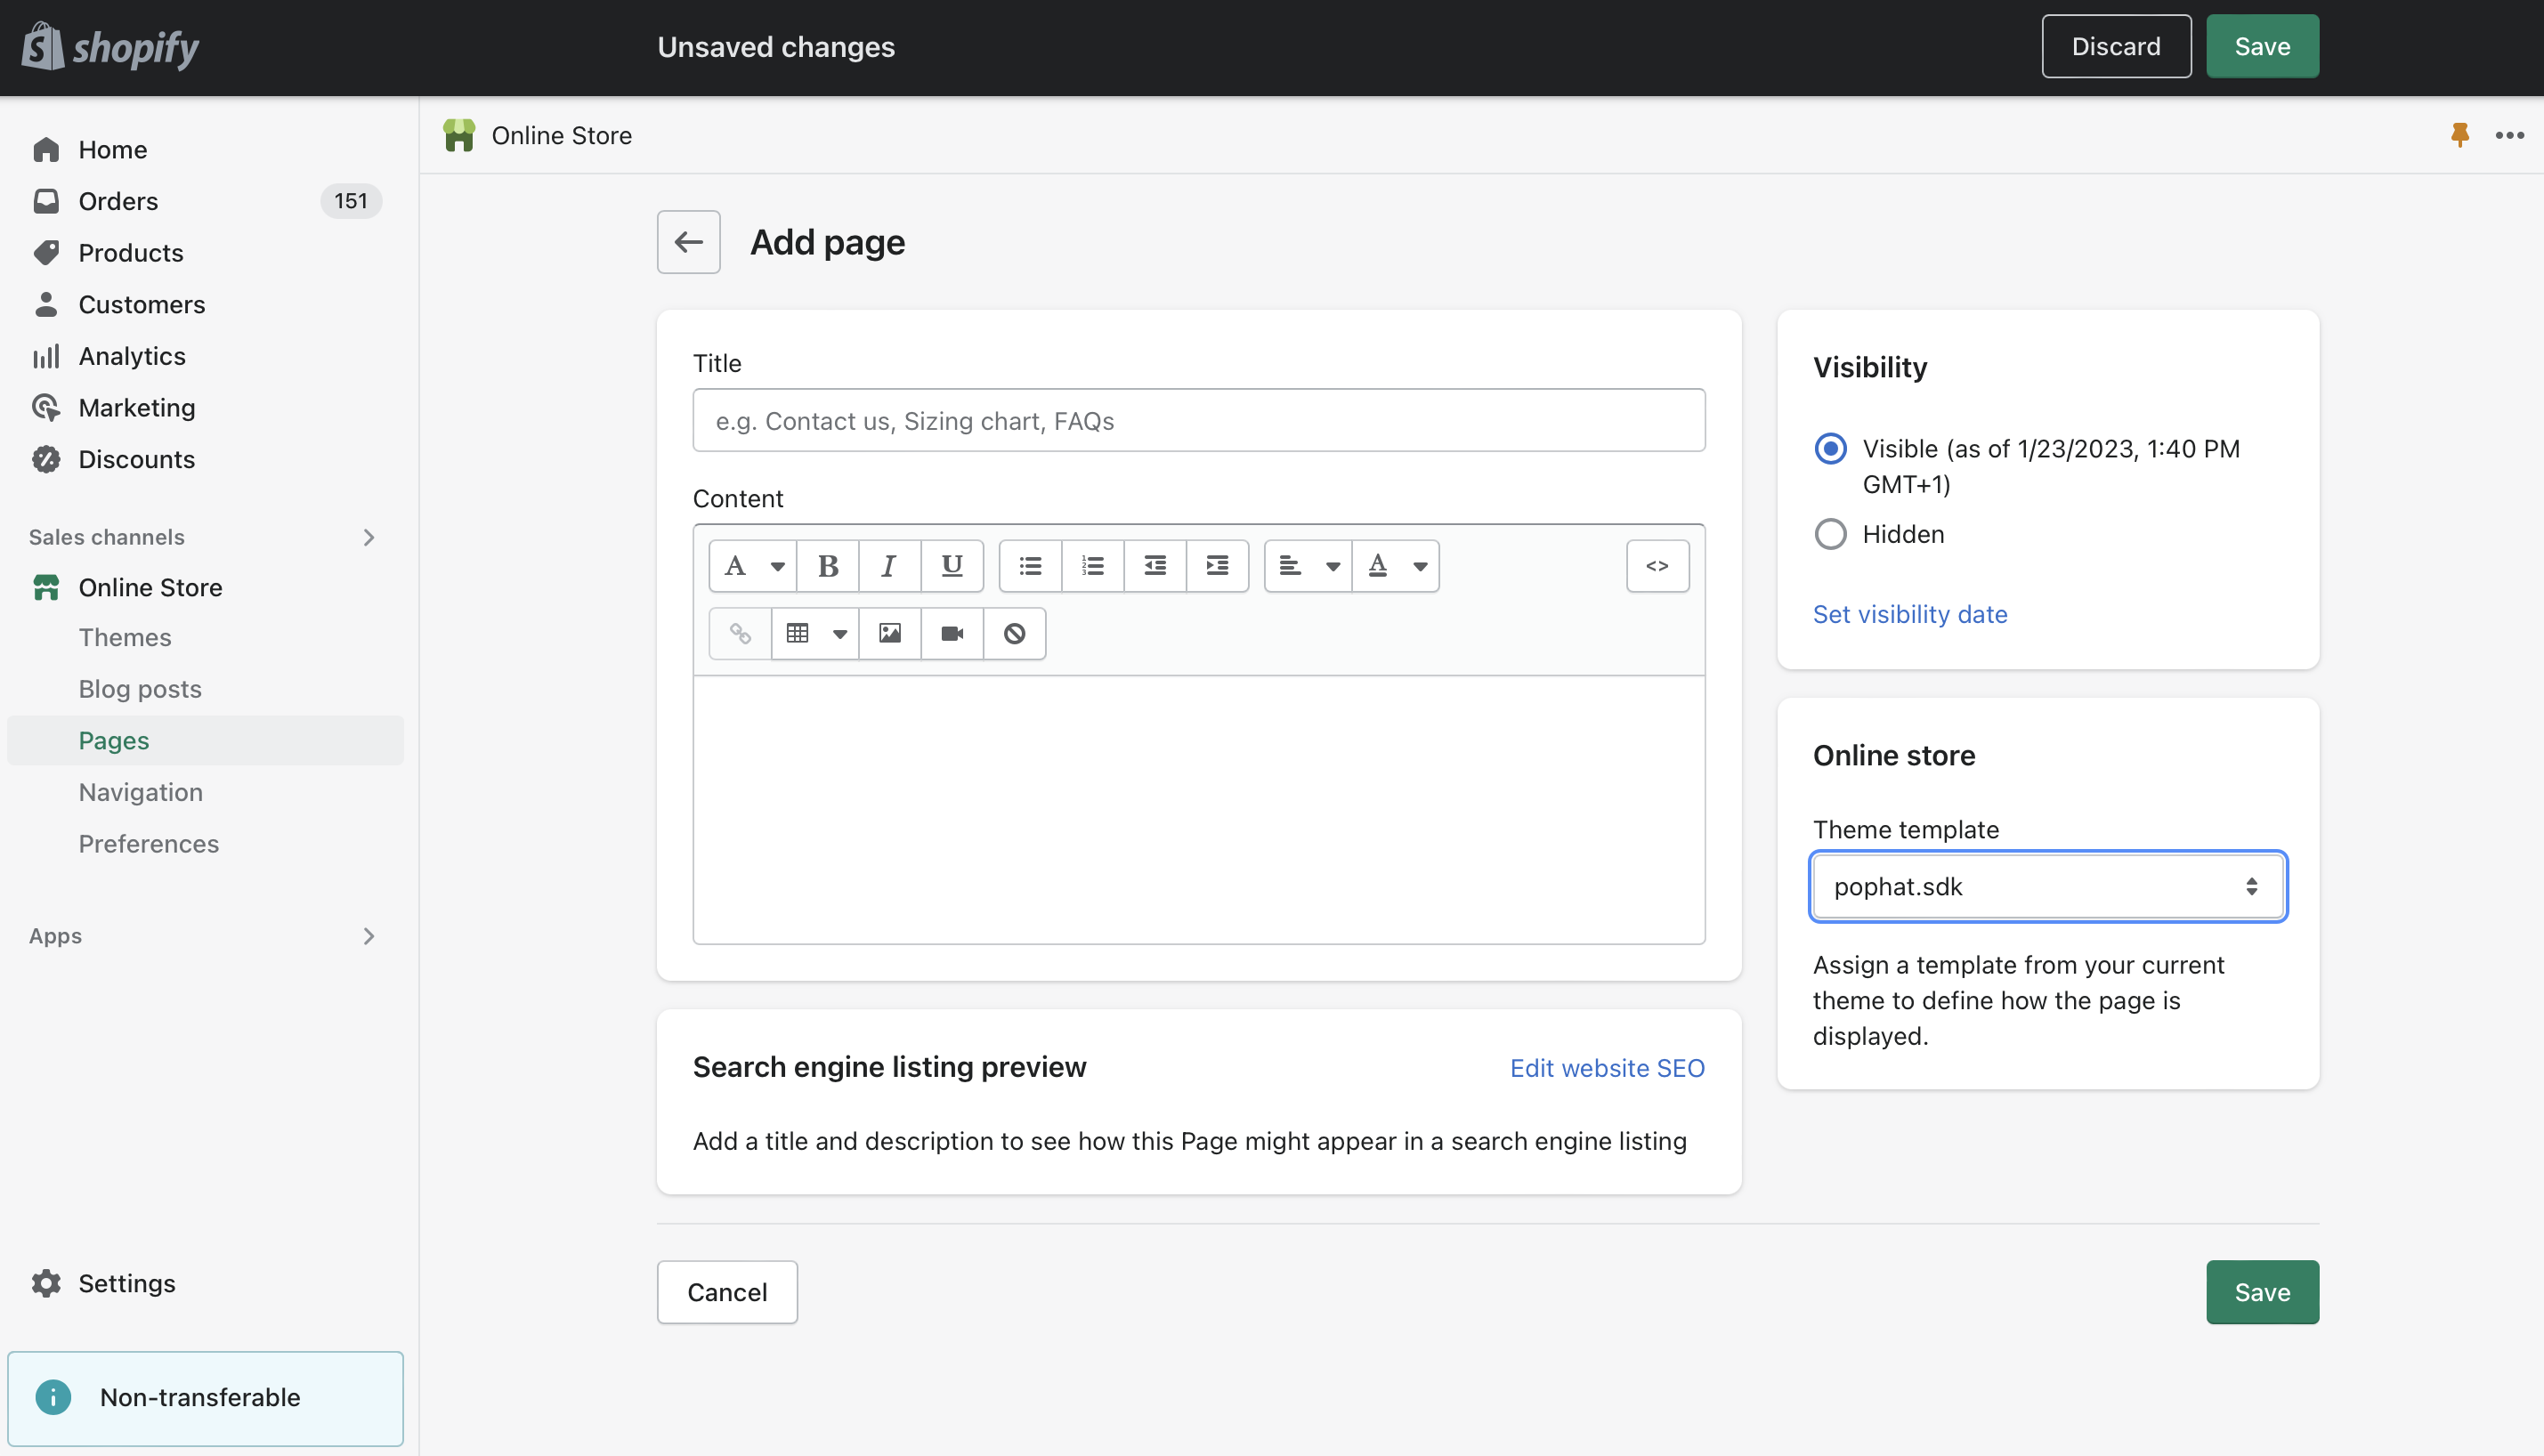
2.2 Create Shopify Page
From the Shopify admin create a new page and use the liquid template loyalty_sdk_page

Liquid template creation
3. Optimize the user flow
3.1 Redirection after customers log in (sign in) or create an account (sign up)
When using the inline display mode, to avoid interrupting the user flow, it is important to redirect the user back after a sign-in or a sign-up coming from the page including the UI rendered by the SDK.
- Edit the customers/login.liquid template to add a hidden input named
return_tothat will be used to get the url of the page including the splio-sdk div dynamically:
{% form 'customer_login'  %}
	<input type="hidden" name="return_to" value="">
	{%- if form.errors -%}
		<div class="form-message form-message--error">
		  <h2 class="h3 form-message__title " tabindex="-1" data-form-status>{{ 'contact.form.error_heading' | t }}</h2>
		  {{ form.errors | default_errors }}
		</div>
	{%- endif -%}

	// Use Javascript to dynamically load the value

   <script type="text/javascript">
      document.addEventListener('DOMContentLoaded', function() {
        const queryString = window.location.search;
        const urlParams = new URLSearchParams(queryString);
        const redirectParam = urlParams.get('redirect');
        document.querySelector('input[name="return_to"]').value=redirectParam+window.location.hash;
      });
    </script>

	// The login page link must contain a redirect param in the header.liquid
	<a href="{{ routes.account_url }}?redirect={{ page.url }}">

...- Finally, on sp-ring.com make sure to include in the Loyalty SDK configuration:
"unconnected": {
	"signin": "https://{store_name}.myshopify.com/account/register",
	"signup": "https://{store_name}.myshopify.com/account/login"
}
redirect param and anchor will automatically be added by the SDK on the links.
You are now ready to test your integration!
Test environment
If you don't have a Splio test environment you can decide to test your implementation on a staging theme of Shopify and force a test user settings.
You can duplicate your current theme in Shopify as a draft to test your SDK implementation. Force the customer_id in your liquid or in metafields to avoid creating new contacts on your running program.
Track events
You can easily implement our JavaScript tracking module to send custom events to any external system of your choice. We describe the details here.
Updated 5 months ago