
Splio Criteo connector
Provided by: Splio
Connector type: Destination
Third-party system: Ads
Required license: "Marketing Automation + CDP" or "Predictive AI (previously Tinyclues)"
Overview
Splio Criteo connector lets you use audiences built with Custom Audience Filter in Criteo for display advertising campaigns.
This data transfer aims to make the most of the predictive and deterministic attributes in Custom Audience Filter to create effective display campaigns in Criteo.
Prerequisites
To be able to use this connector, you need first to:
- have a Splio CDP account
- have a Criteo account
Criteo side
Setting up a client credentials application
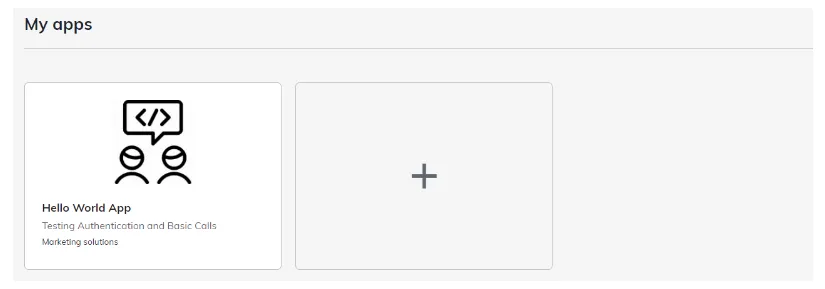
- Log in to Criteo Partners Portal, create a new App by clicking on ➕ button in the My apps section.
-
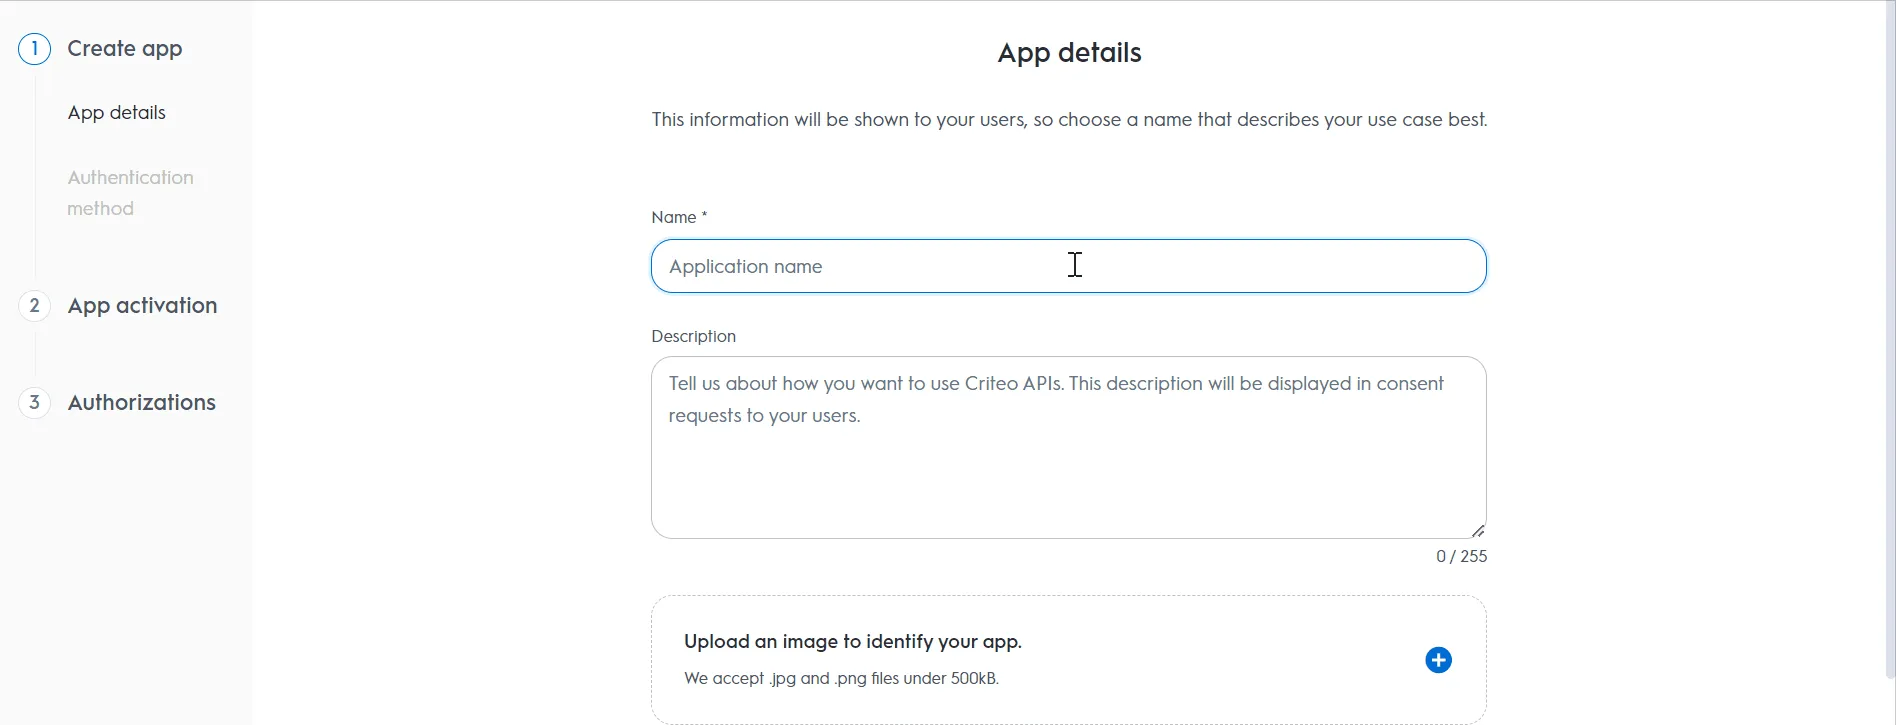
Step 1. Create app
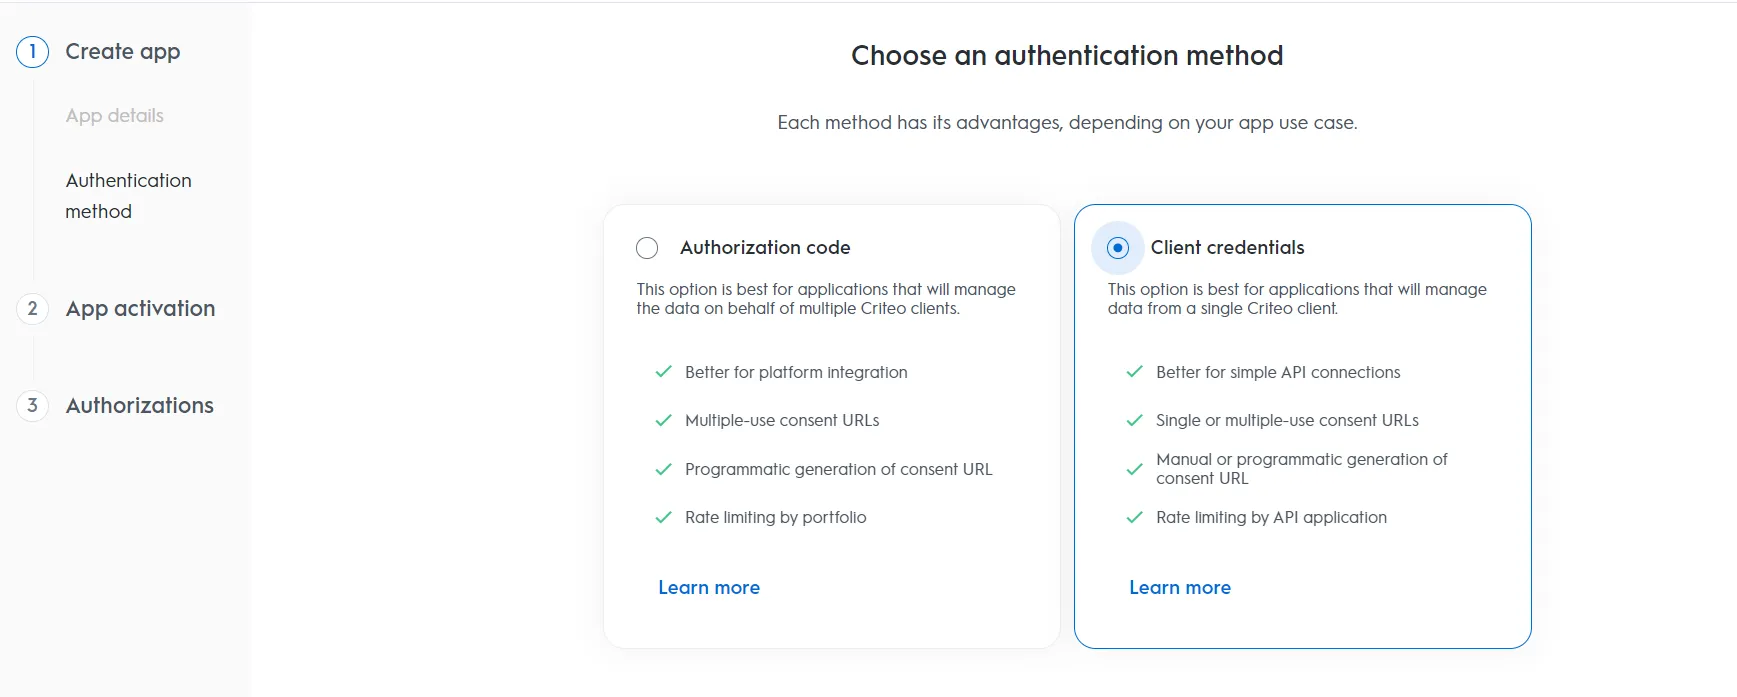
- Fill app details, select Client credentials as Authentication method.
-
Step 2. App activation
- Select which Criteo service you want to use your API application with. Chose C-Growth for marketing solutions or C-Max for retail media.
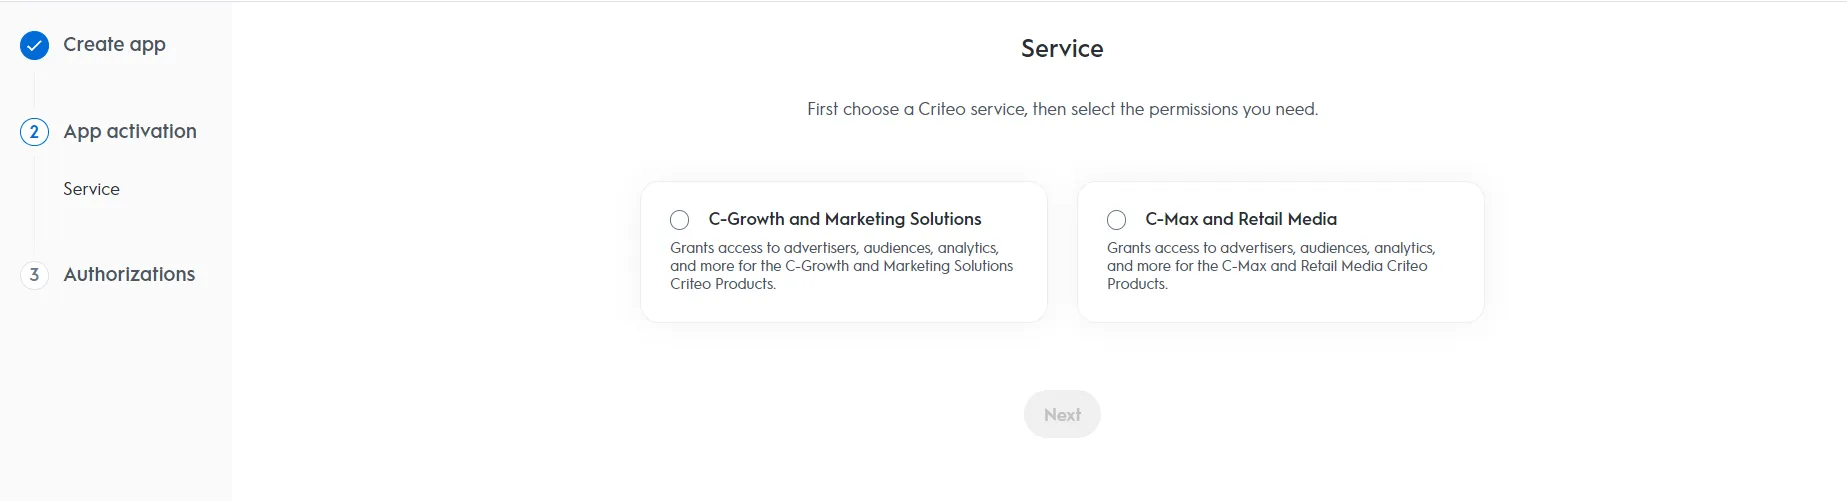
C-Growth and Marketing Solutions is the most used solution with Splio CDP.
-
Step 3. Authorisations
- Select the domains to choose which permission access your application will need.
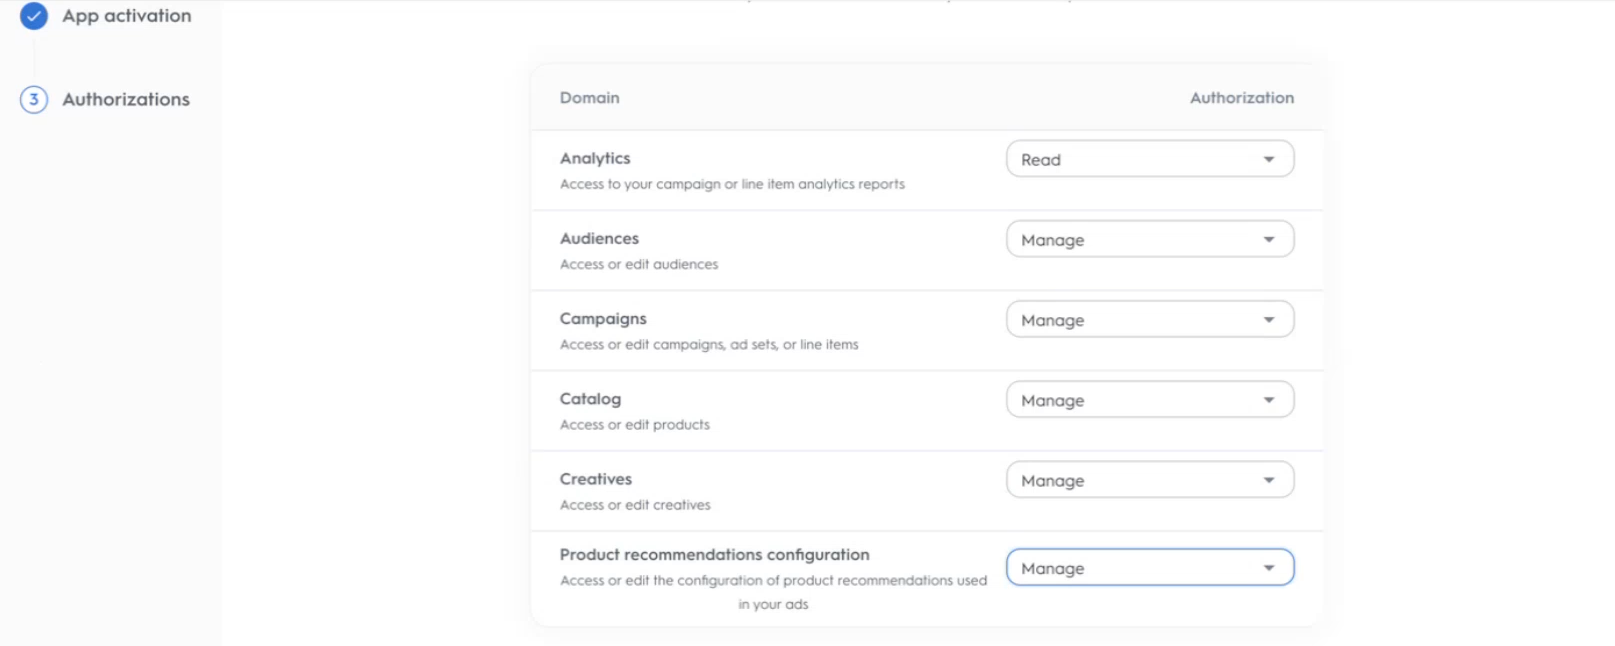
The Manage permission level is mandatory to be able to export audiences. When this level is not provided in selection, you can let Read permission
-
App Credentials
- To generate your client_id and client_secret click the "Create new key" button.
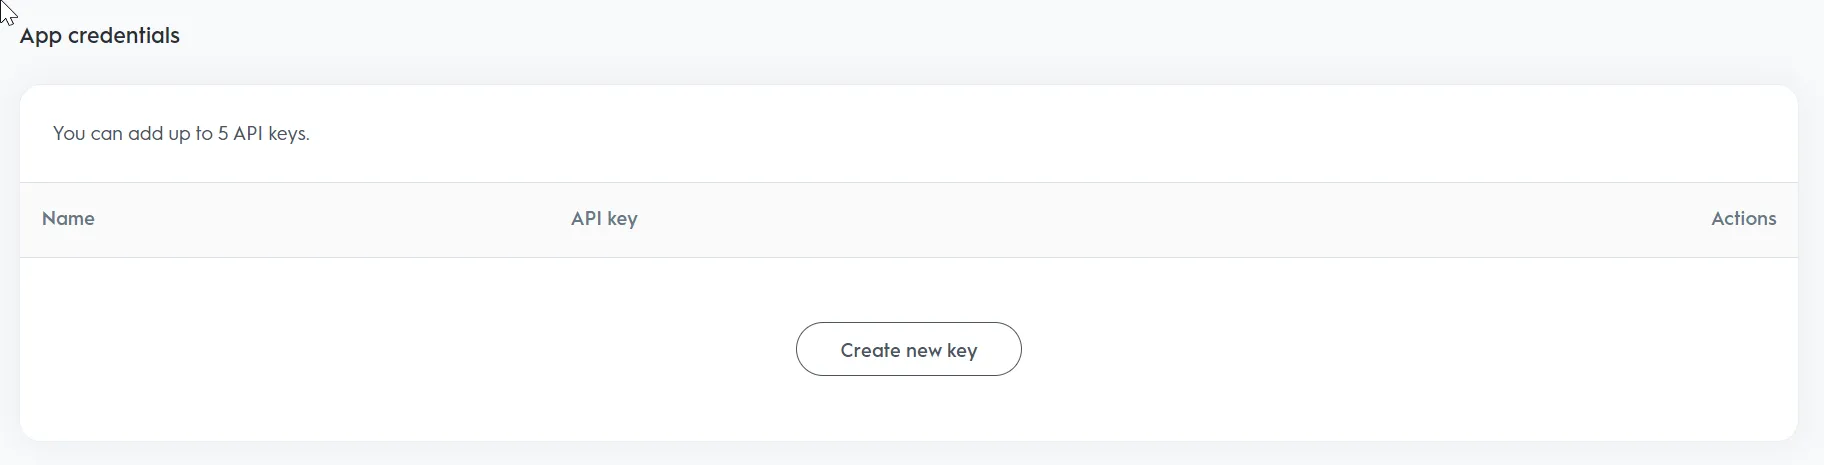
A file will be directly downloaded in your browser. In it, you'll find informations needed to setup the connection in Splio CDP platform
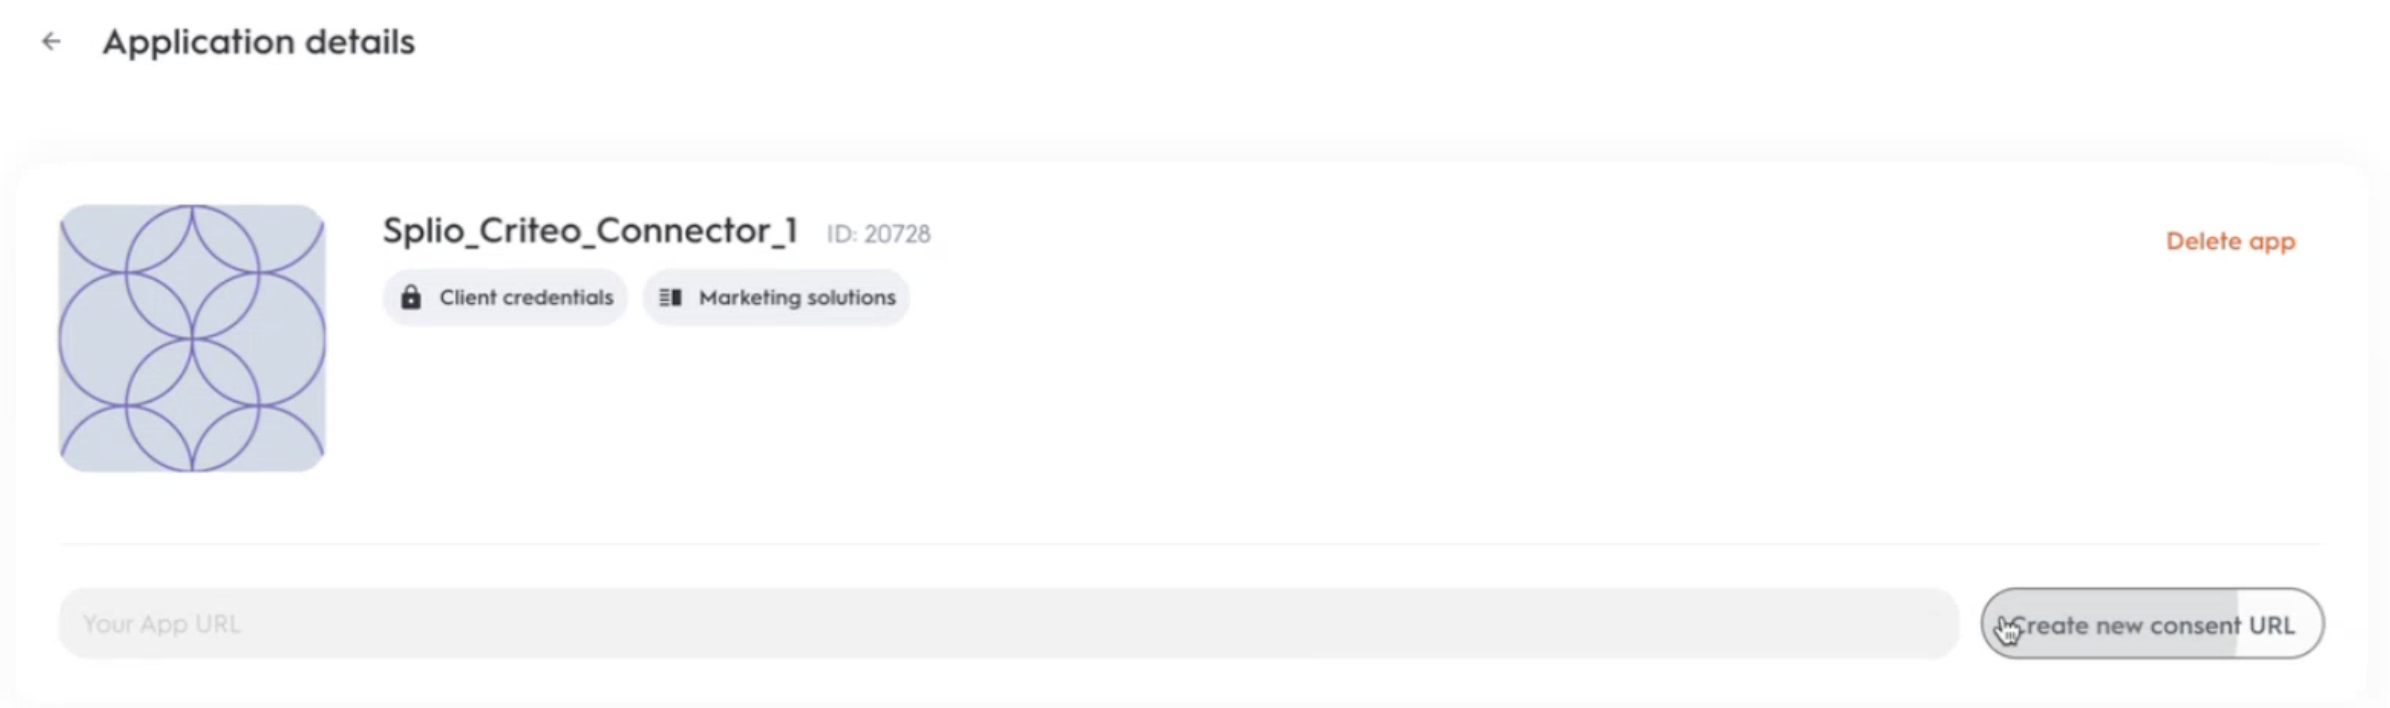
Consent URL Generation
After setting up your API application, you need to give permissions to your new application by generating a consent URL
To do that, go to top of Application details screen, and click on Create new consent URL button
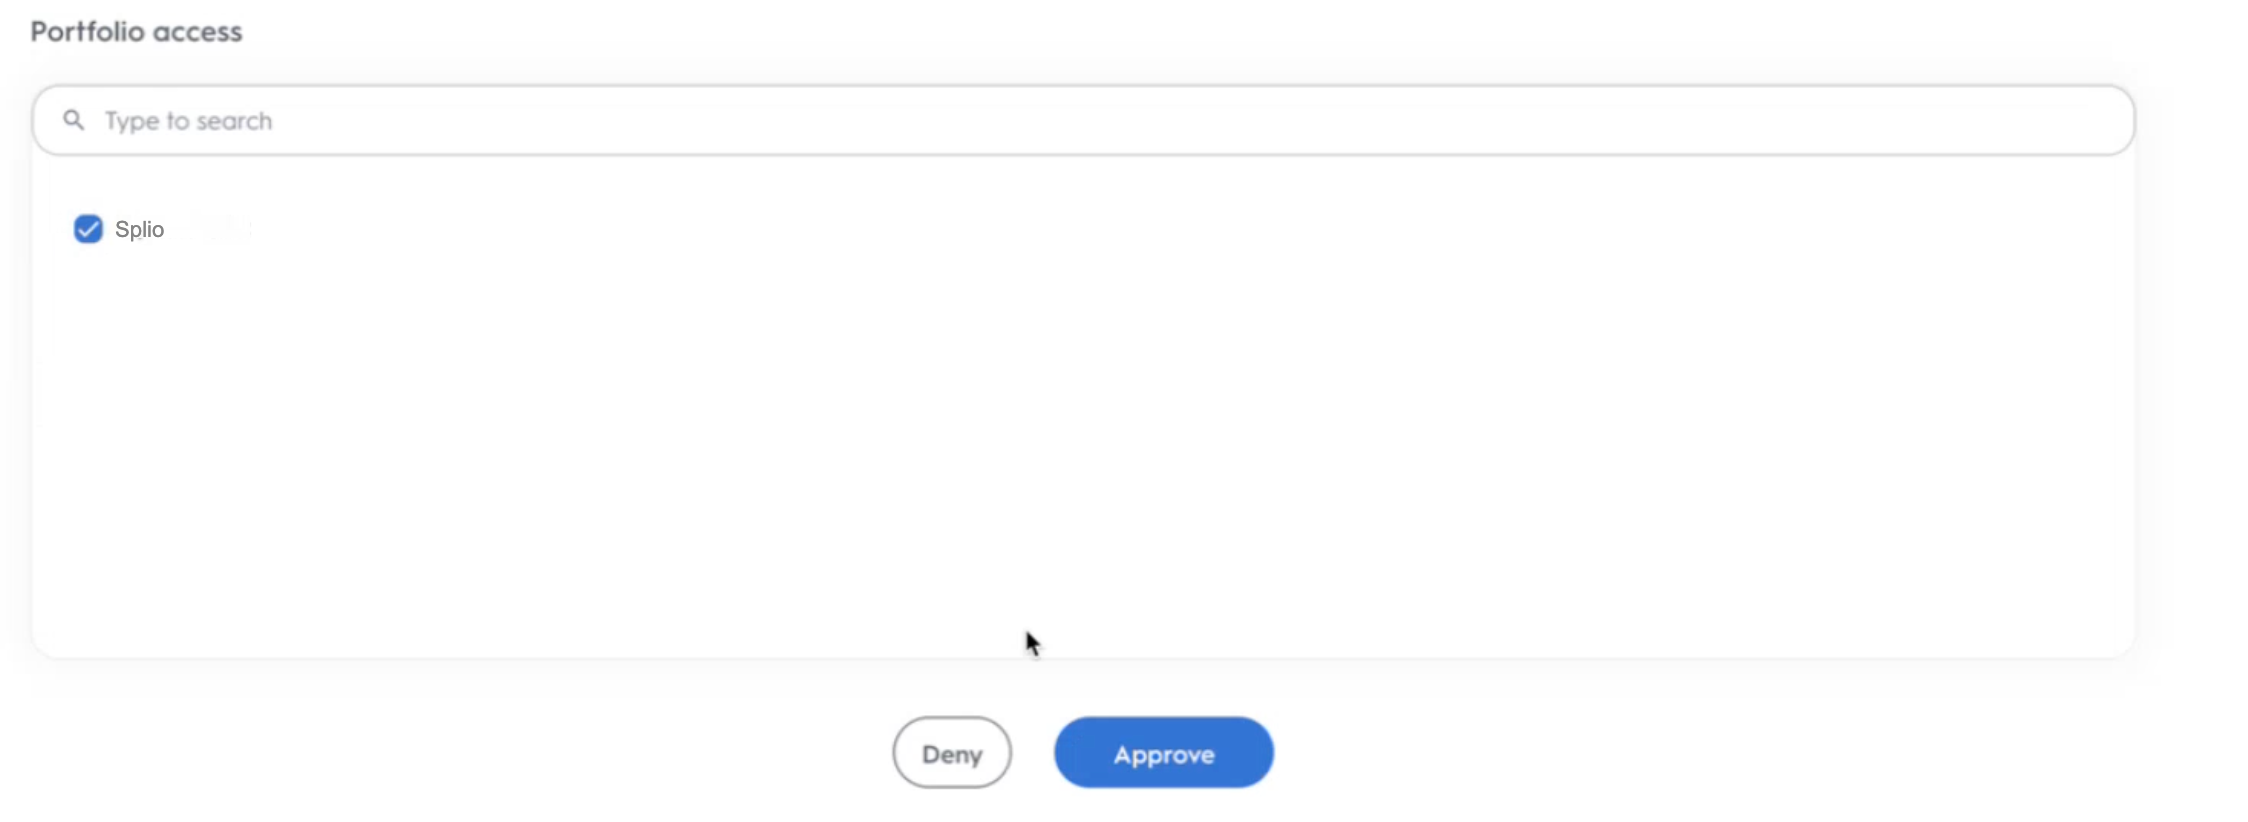
It will generate an url that you need to copy and then paste in your browser
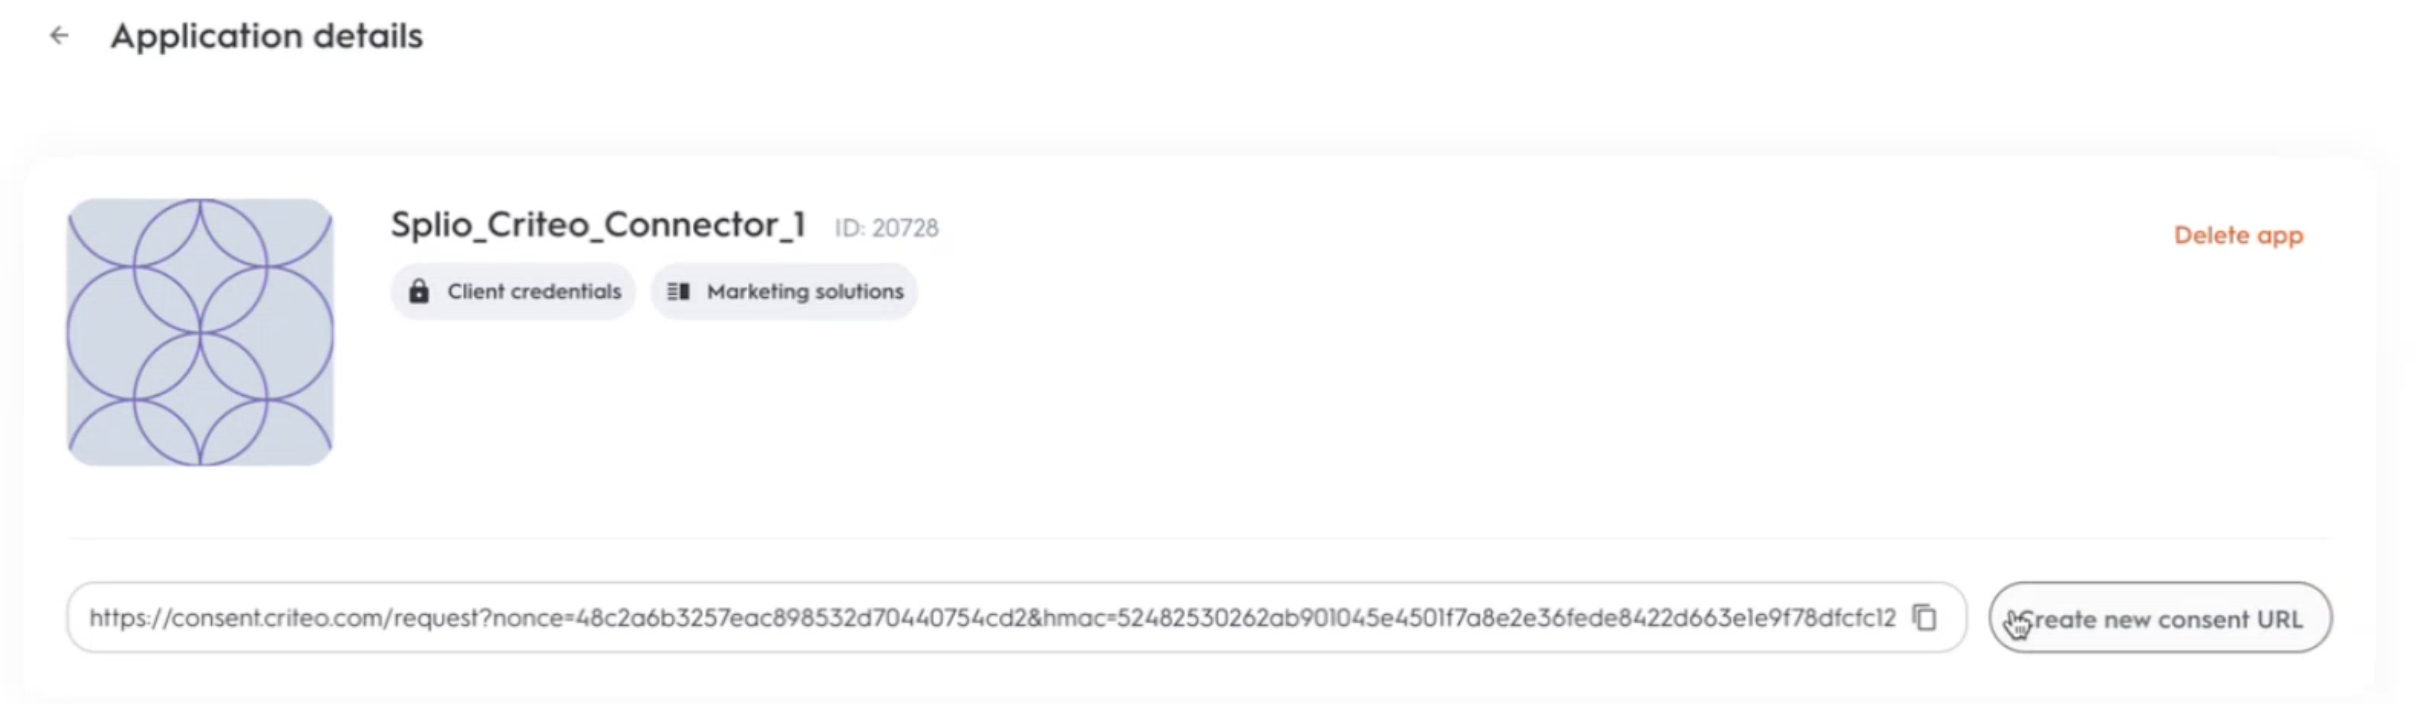
In the new screen, you have to scroll down and select criteo portfolio you need to access. Then Approve.
A screen like this one should appear:
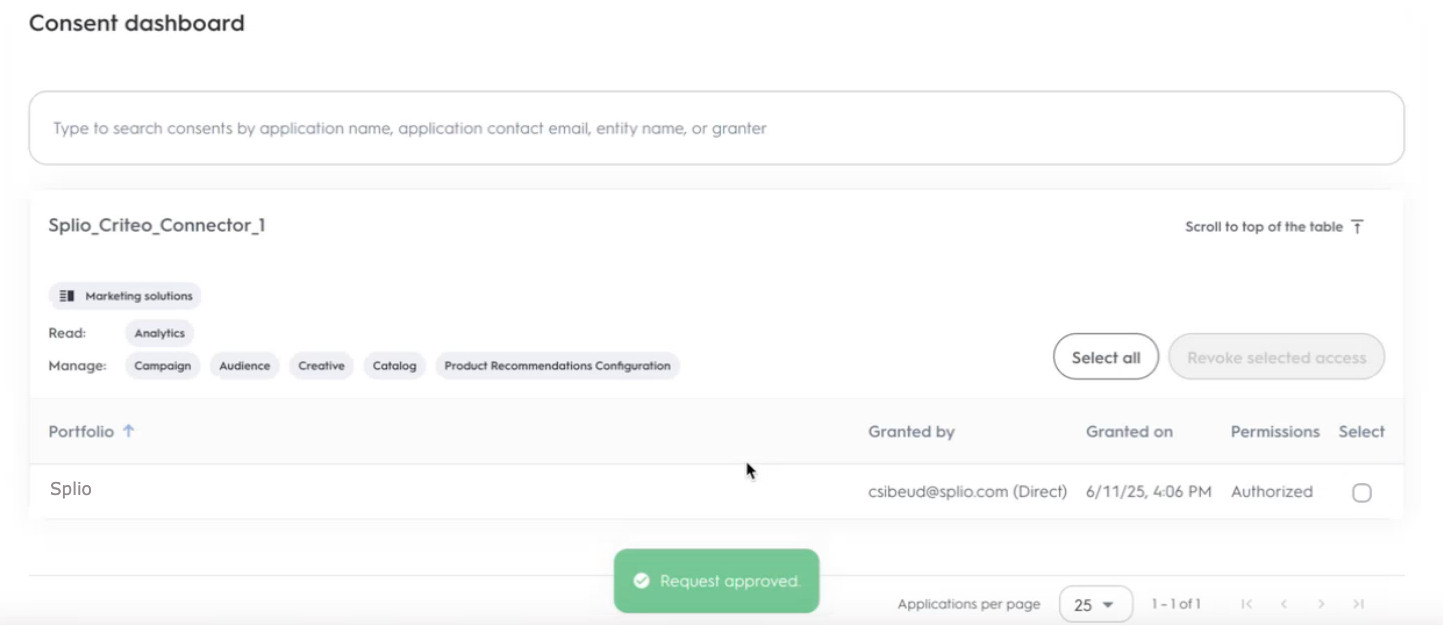
If your account doesn't have enough rights to approve the application, you'll need to regenerate a new consent URL and send it to a member of your organization with higher privileges (users with admin, business manager and technical manager should have access to grant consent)
Splio CDP side
Process
How it works
- Criteo Exporter creates/updates the audience specified by campaign from Splio CDP.
- Uploads the list of users exported from Splio CDP using API.
This connection it consists of 3 steps:
- Connection details
- Export details
- Finish
Connection details
In the first step of a connection with Criteo setup, you'll need to provide three pieces of information :
- Connection name: the name of the connection to find it easily in Splio CDP platform
- Client ID: the client_id you can find in the file you download when you create a new key in Criteo
- Client secret: client_secret you can find in the same file than client_id

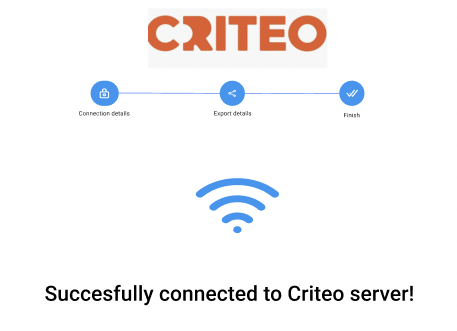
If your credentials are ok, you'll be able to go to the second screen
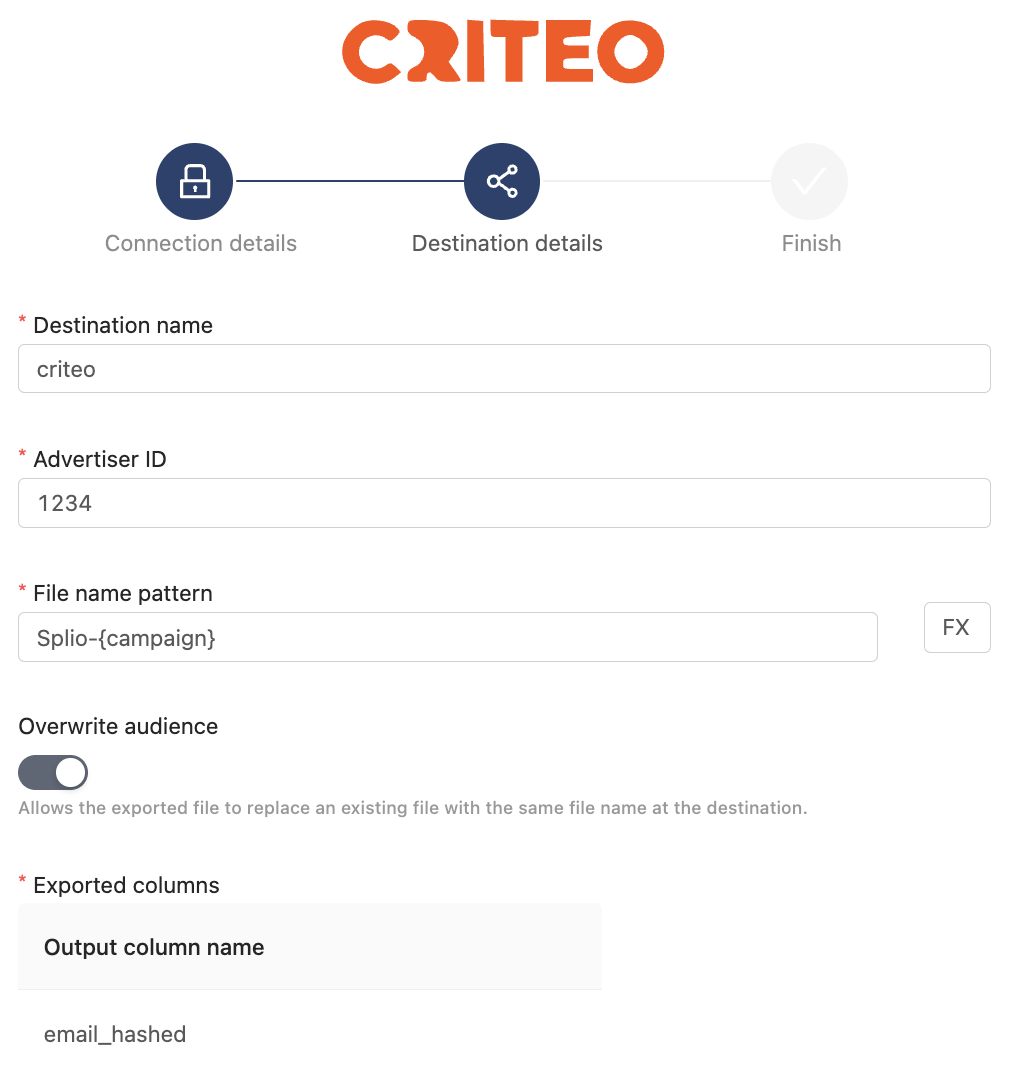
Destination details
The second step of the process is preferences of the exported file
For this part fill:
- the name for the criteo destination (as it will be displayed in campaign plan or custom audience filter)
- the advertiser ID for your destination criteo account
⚠️ To find this advertiser ID, you can retrieve it when you log in Criteo platform, url looks like https://marketing.criteo.com/homepage?advertiserId=XXXX. The advertiser_id is what replace the XXXX in your url
As a general rule, you can stick to the default proposed value for other information
Splio-{campaign}as the file name pattern for generated exports- Overwrite audience switched to ON (allows for recurring update of synchronized audiences)
And finally select the field of the Splio user table to be used to match audiences users to criteo (generally email_hashed field, please get in touch with you Splio contact in case you are unsure of the field to select)
And your connection is ready!
This new connector will appear now on the connected list.
Updated 11 months ago